How to Liquidate Your Stocks
There are several ways where you can liquidate your stocks in Eva. You can apply the steps and the features below to do so.
Scheduled Pricing
Scheduled Pricing is for sellers who want to reduce or increase their minimum price with unique settings only Eva can provide!
Your minimum price will decrease or increase according to your total sales unit desired in a time interval you can specify. And last but not least, these settings will apply by controlling every “X” day that you defined.
Schedule Pricing Settings on Eva
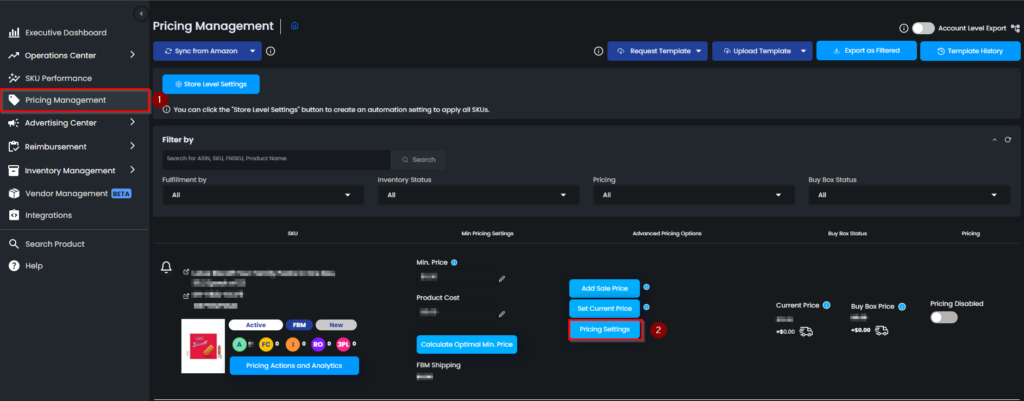
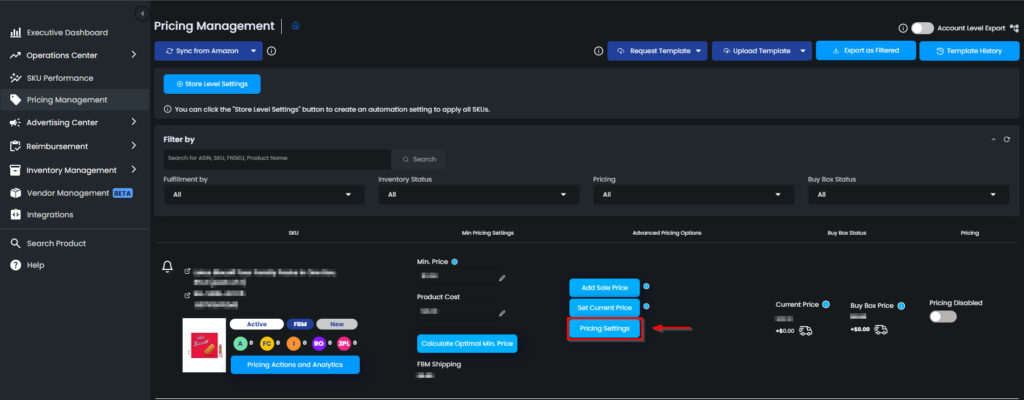
To apply the feature, go to the “Pricing Management” page and find the SKU of which you want to schedule a reduced or increased minimum price. Please see Figure 1 below.
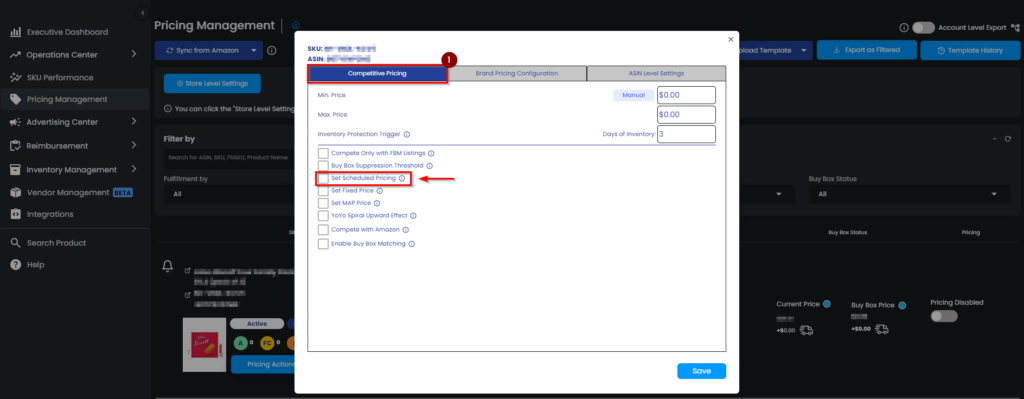
A pop-up screen will appear. On the “Competitive Pricing” section, go and check the “Set Scheduled Pricing” box. Please see Figure 2 below.
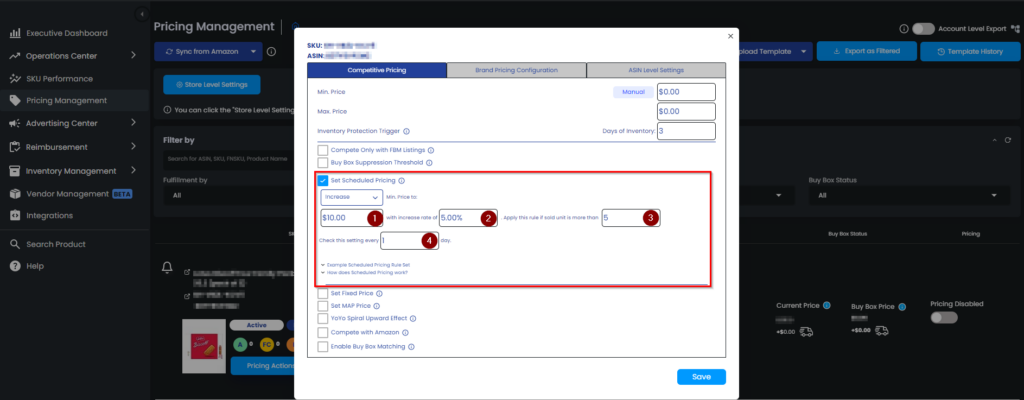
When you check the box, a new section will open on the pop-up screen. The first box is the choice of either you want to decrease or increase the minimum price. Please see Figure 3 below.

Increase the Minimum Price
Upon your choice, increasing the minimum price would help you to maximize your profit while taking care of your sales velocity.
Once you selected to increase the minimum price option, you will display four text boxes related to the setting. You can define the settings in this area according to your business needs. Please see Figure 4 below for the box’s explanation.
- The first box is for your desired minimum price of X unit.
- The second box is the increase rate as X percent.
- The third and fourth box rules work together, it is basically to protect your sales velocity while increasing your minimum price. These rules will only apply if you do not lower the X unit total sales during time interval you define as X days.
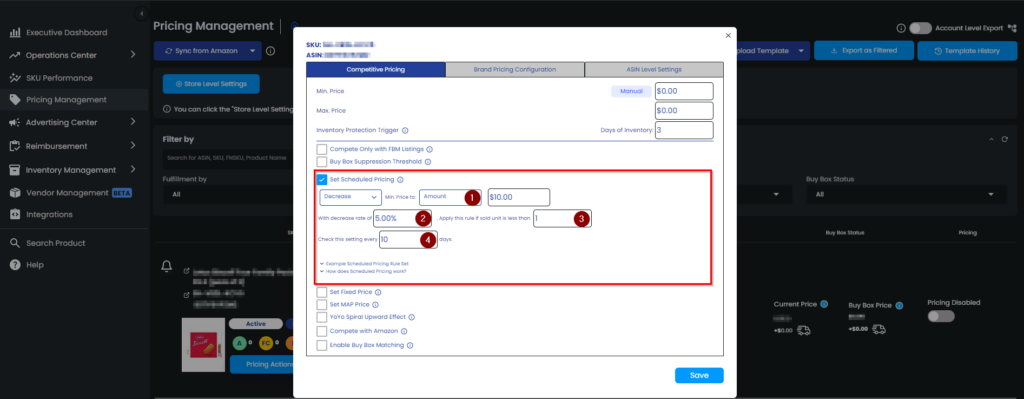
Decrease the Minimum Price
If your sales velocity isn’t what you wanted it to be, you could choose to lower the minimum price, which would aid in the liquidation of your inventory.
After choosing the option to decrease the minimum price, four boxes relevant to the setting will display. The parameters in this area can be customized to fit your business needs. Please see Figure 5 below for the box’s explanation.
- The first box is for your desired minimum price choices as cost, fees, cost plus fees or custom amount.
- The second box is the decrease rate as X percent.
- The third and fourth box rules work together, it is basically to prevent you from losing any profit while increasing your sales velocity. These rules will only apply if you do not reach the X unit total sales during the time interval you define as X days.
Important reminder: You should click the save button after you finish your transactions to settle your rule.
Minimum Advertising Price (MAP)
Minimum Advertising Price (MAP) is a feature that allows you to set time intervals for the minimum price is active. MAP tool can be found in Pricing Settings. A pop-up menu will occur once you click pricing settings. See Figure 6.
Click on the Set Map Price box to enable the MAP Pricing option. You will see that a box will appear; you should insert a minimum price in this box. See Figure 7.
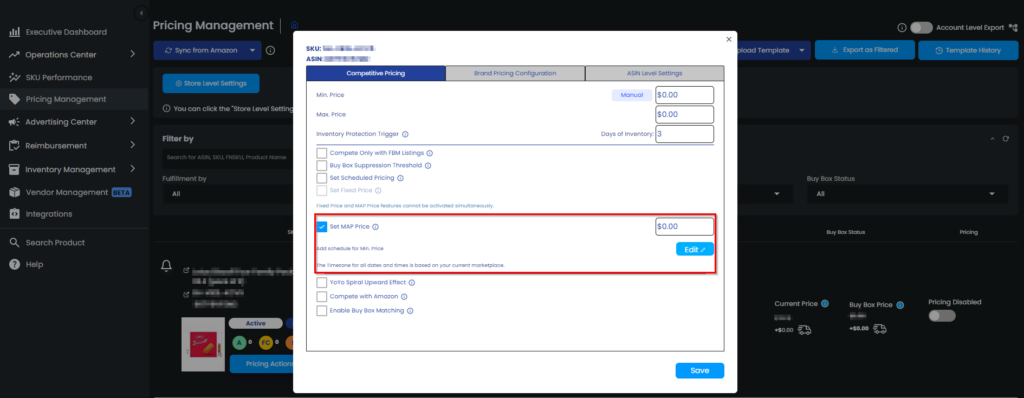
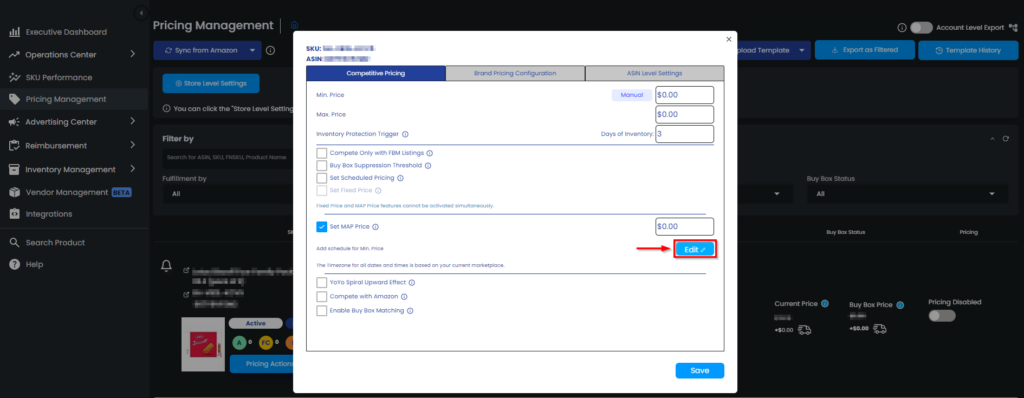
It would be best to consider that you cannot activate Fixed Price and MAP Price features simultaneously. The next step is selecting a time interval for your Min. Price. Then, click the Edit button to set the time intervals. See Figure 8.
Clicking the Edit button will open a three-box menu where you can choose days and time intervals. Your minimum price will be activated between these time intervals. You can set more than one rule for a selected SKU. See Figure 9.
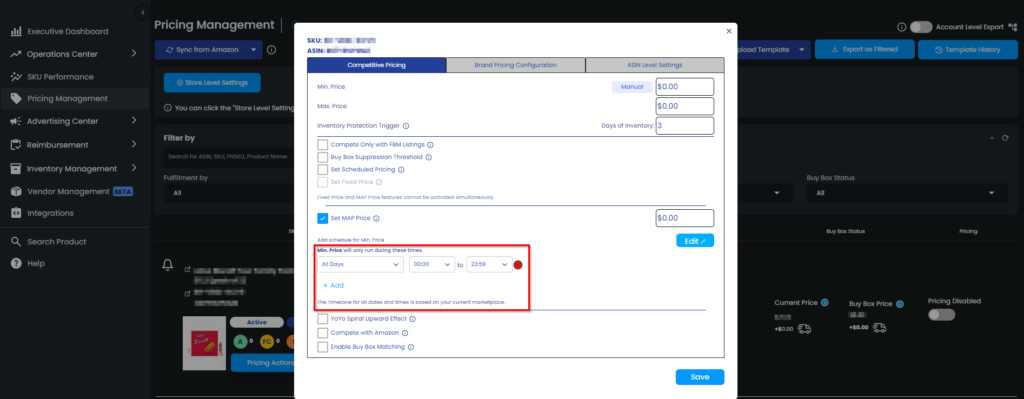
Note that your minimum price will be activated only between these time intervals. Besides these intervals, your regular pricing will be activated.
Important reminder: You should click the save button after you finish your transactions to apply the setting.
Ready to Elevate Your Success? Book a call with our experts—just enter your email below to get started!