Shopify Integration
Eva gives seamless integration with Shopify stores to simultaneously synchronize your listing prices on Amazon without any hassle.
You can easily and smoothly manage your Shopify account with Eva. You can sync your Shopify and once Eva makes changes to your prices, you will be able to see price changes accordingly on Shopify. You can set rules for your price flexibility to have your Shopify prices equal, above, or below a certain percentage of your Amazon prices!
The steps you need to take are super simple. So you can start your Shopify reprice journey with Eva in no time.
Note: Shopify integration is available for US and EU marketplaces only. The other marketplaces will be available soon!
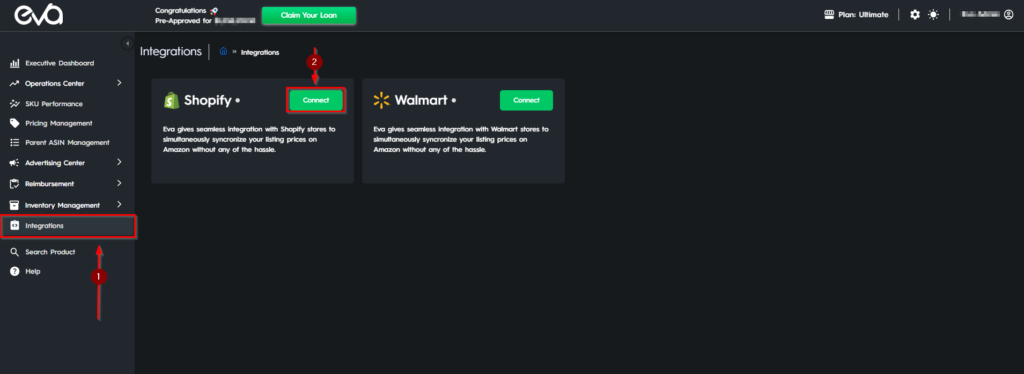
To connect your account, hover over the menu and click on ”Integrations” and click on the ”Connect” button to enter your shop information.
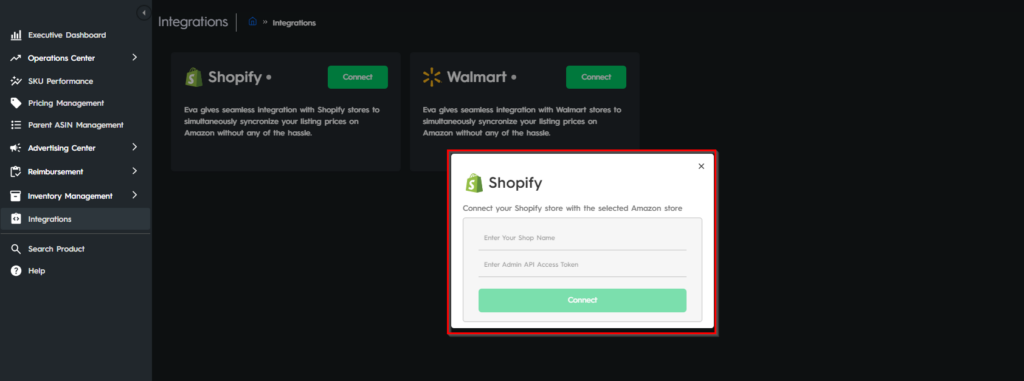
On the pop-up screen;
- Enter your Shopify Shop Name.
- Enter Admin API Access Token.
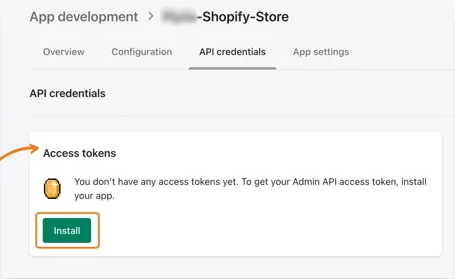
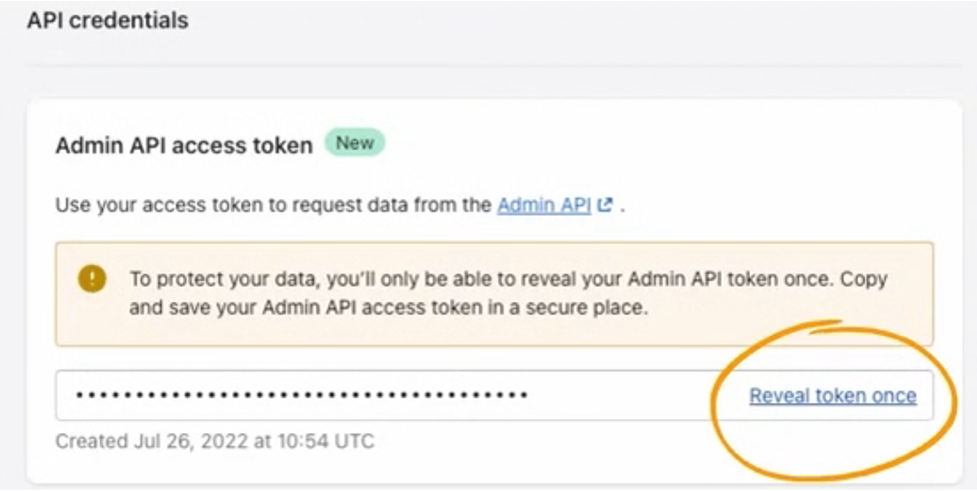
How to Generate your Admin API Access Token from the Shopify Admin:
- Go to the “API Credentials” tab
- Click on “Install” in the “Access tokens” box.
- Click on “Install” in the pop-up screen.
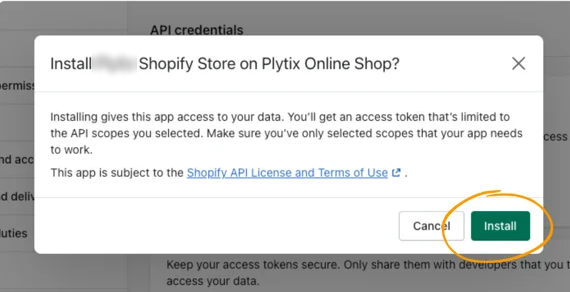
- Your token has been generated. Click on “Reveal token once” and you will see the token.
Shopify Authorization
To be able to get the current data, order data authorization is required for Eva.
To do that, go into your Shopify account and click on Apps.
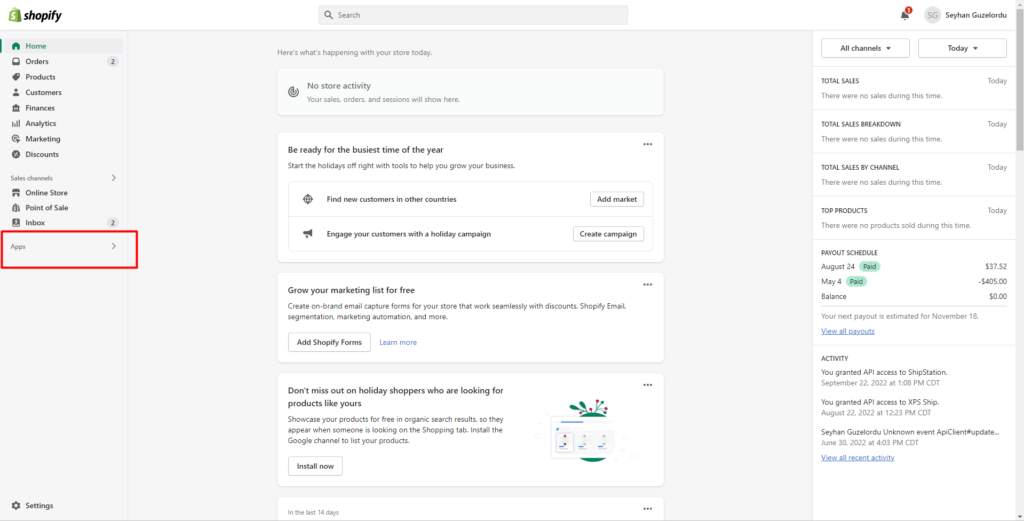
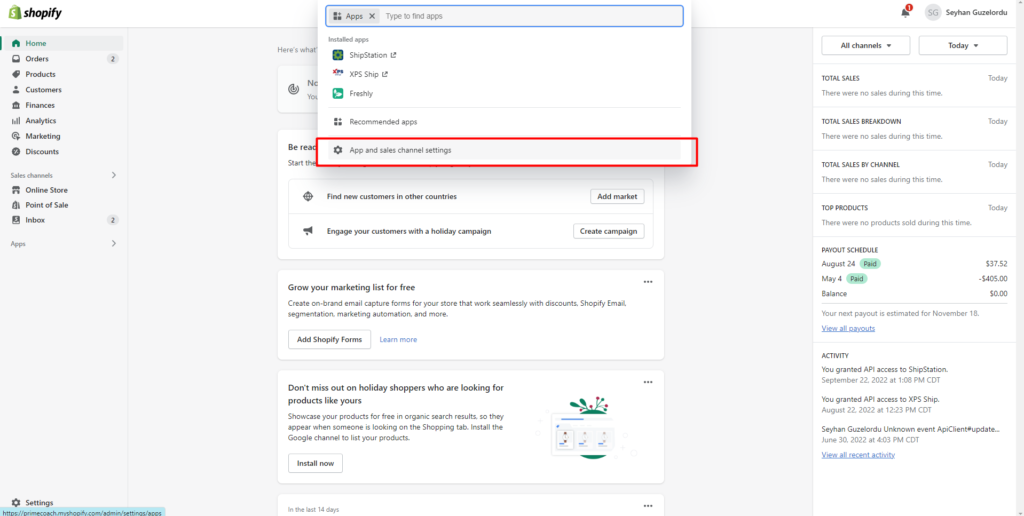
Then, go to apps and sales channel settings.
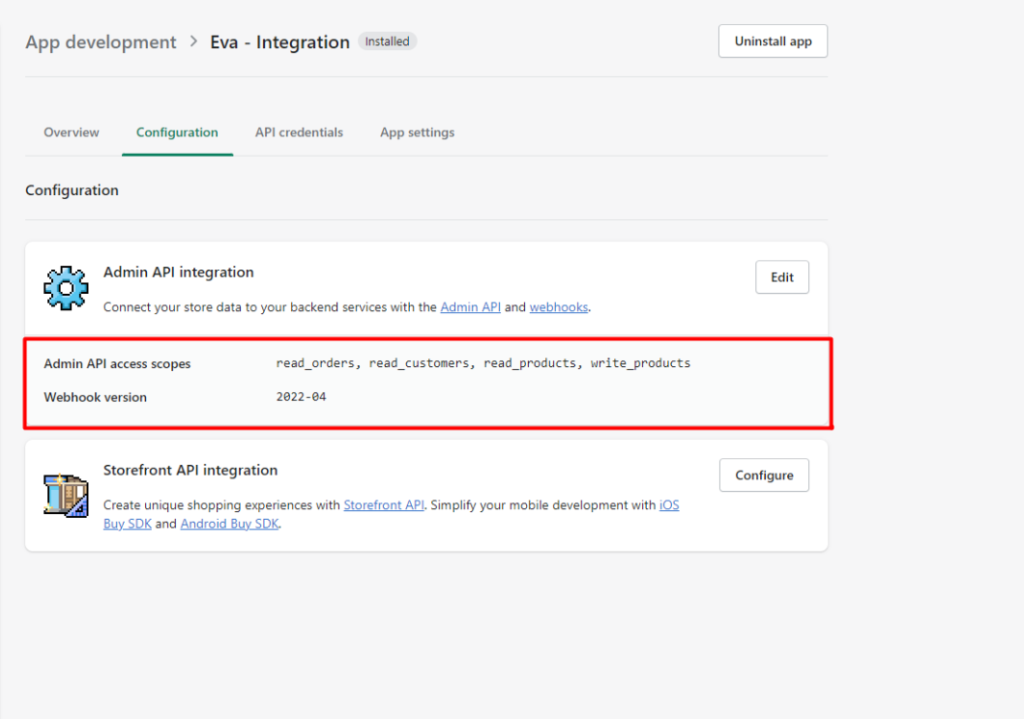
Below configurations, you should click edit on admin API integration and give permission to “read_orders, read_customers, read_products and write_products.”
After these steps, you can start the connection process quickly.
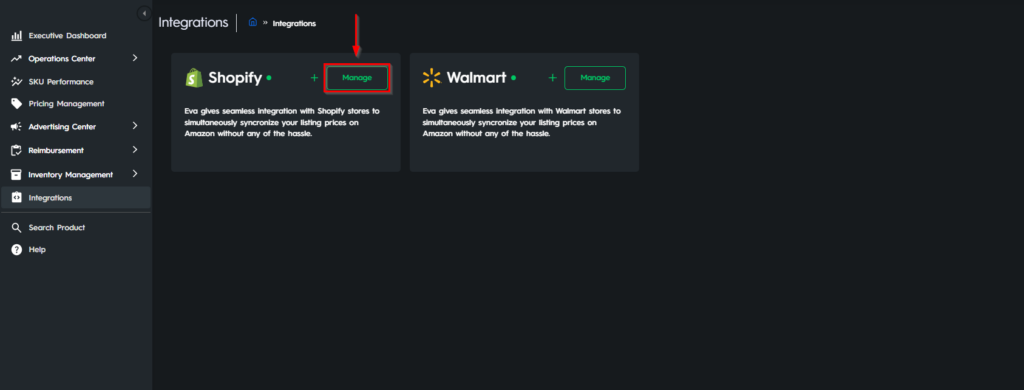
Then click on the ‘Manage‘ button for Shopify.
Click on the ‘Sync your Amazon prices to Shopify‘ button in order to see the dropdown list. Click on ‘Request Template‘ and once it is ready, ‘Download the Template‘.
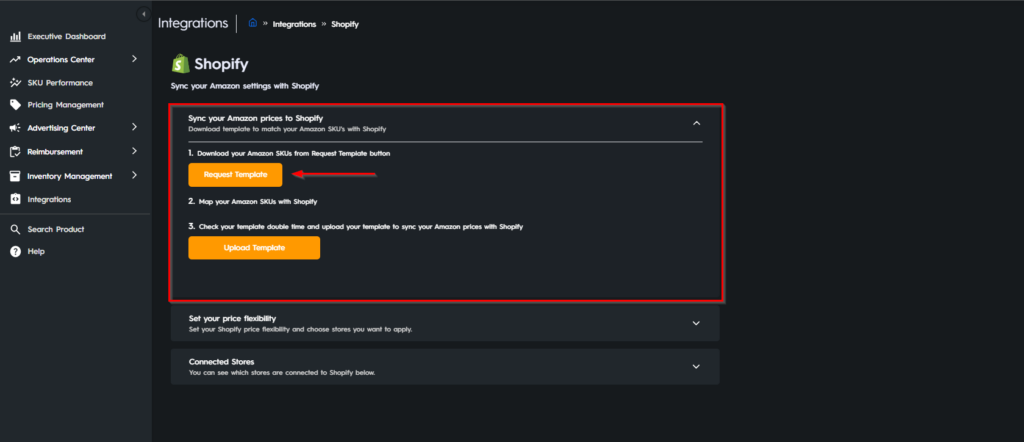
Once you download the template you will see the Product Name, Amazon SKUs and Shopify SKUs. Enter your Shopify SKUs to match with Amazon. After you have entered your Shopify SKU, make sure to change the ‘Sync Status‘ to ‘Enable‘.

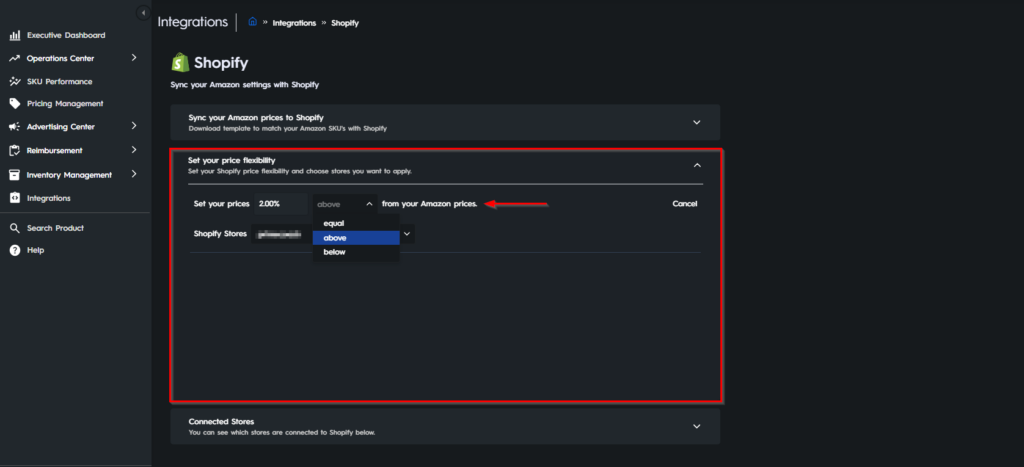
You can choose to price your products with different rules based on your Amazon prices. Your Shopify SKUs can be below, above, or equal to your Amazon prices. If you select below or above, you can also decide on the percentage of your Shopify products to be repriced based on Amazon prices.

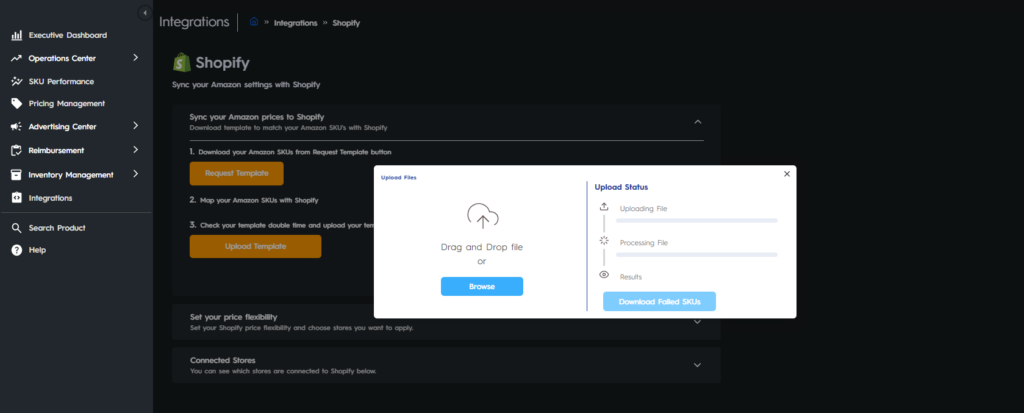
Once it is completed, Upload the Template to Eva.
You can also set your Shopify price flexibility in bulk. Click on the second dropdown list, set your price flexibility, and set your Shopify prices equal, above, or below your Amazon prices.
After you upload your template, your prices will be synced.
To ensure continuous business operations, if you have an FBA and FBM SKUs and one of those is out-of-stock, Eva will use the price of the other available SKU, i.e., In one ASIN, if there are same SKUs but are just FBA and FBM, if the FBA SKU is out-of-stock, Eva will sync the FBM SKU price to Shopify.
“Ready to Elevate Your Success? Schedule a call with our experts today – simply click this link and choose a time that works best for you!”