Pricing Management – Brand Pricing Configuration: Liquidation
Looking to optimize inventory and boost sales? Use the Liquidate option in SKU Price Settings to set custom pricing rules and streamline your liquidation process.
This feature lets you create custom pricing rules designed specifically for products you want to liquidate, helping you move inventory faster without manual repricing.
Important Notes:
- The “New Product Launch” and “Liquidate ” options cannot be selected at the same time.
- A Liquidate Pricing tag will be added to the SKU. If you disable the Liquidate rule, this tag will be removed.
How to utilize the Liquidate option?
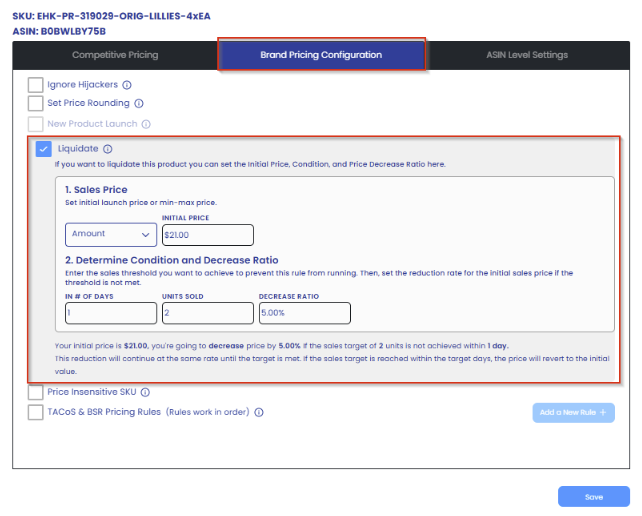
Set the following information to ensure that the Liquidate option will run properly:
1. Sales Price: Set your product’s initial launch price or define a price range using minimum and maximum prices. You can choose to make the Sales Price the same as the Max. Price, or manually enter an Initial Price.
Note: The Initial Price must not be lower than the Minimum Price.
2. Determine Condition and Decrease Ratio: Use this section to control automatic price adjustments.
- Decrease Ratio: If the sales threshold is not achieved, the system will reduce the Initial Price by the percentage you specify here.
- Determine Condition: Set the sales threshold (number of sales) you want to reach. If this goal is met, no changes will be made to the price.
This option provides more control over how you manage product pricing, especially for items you wish to liquidate. It’s an easy way to set up rules for automatic price reductions based on sales performance.
“Ready to Elevate Your Success? Schedule a call with our experts today – simply click this link and choose a time that works best for you!”