How to Set up Repricing with Eva
You may be new to Eva or you are looking for solutions to enable pricing management for your products. Whether you are a brand, agency, or reseller, this article will show you exactly how to easily enable dynamic pricing in bulk!
There are just 3 steps you need to complete to have Eva start dynamically pricing your products (set product cost, set min price & enable dynamic pricing).
However, this guide will explain additional features to have more control of your pricing management solution using Eva.
Getting Started
After your account has been created, your store is connected to the Eva platform, and your data has been synced, you need to log in to your account.
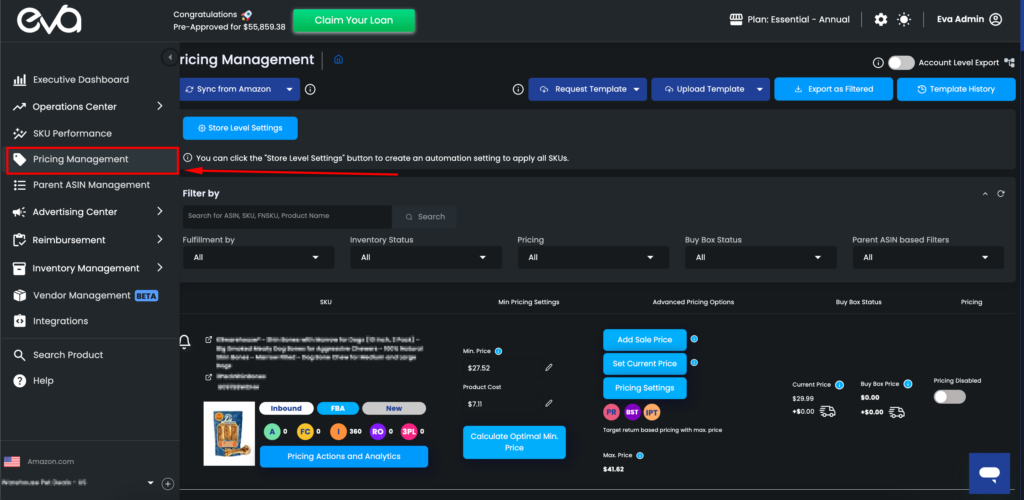
First, you need to hover over to the menu on the left side of the app and click on “Pricing Management” page. See Figure 1 below.
Uploading your prices in bulk means that you don’t have to enter your cost and min price information one-by-one, but instead do it on an Excel sheet easily and upload it to the Eva platform.
To create a template, hover on the “Request Template” button. And choose “Pricing Template as Excel“.
See Figure 2 below.

Depending on your SKU count, the template will automatically generate & be ready to download. This process could take as much as 30 seconds to generate.
Meanwhile, you will see “In Progress” while your template is getting ready. See Figure 3.
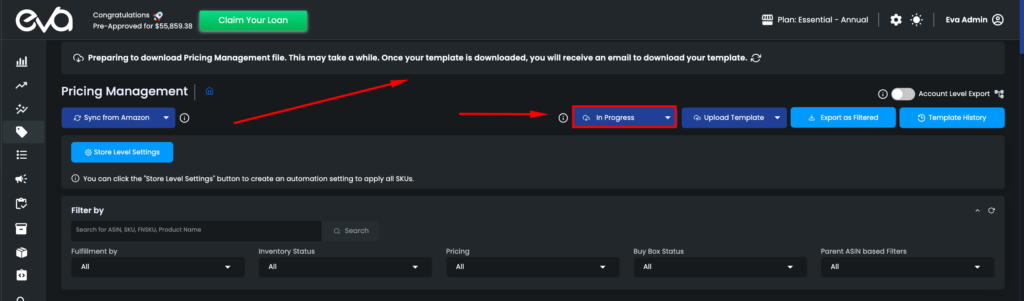
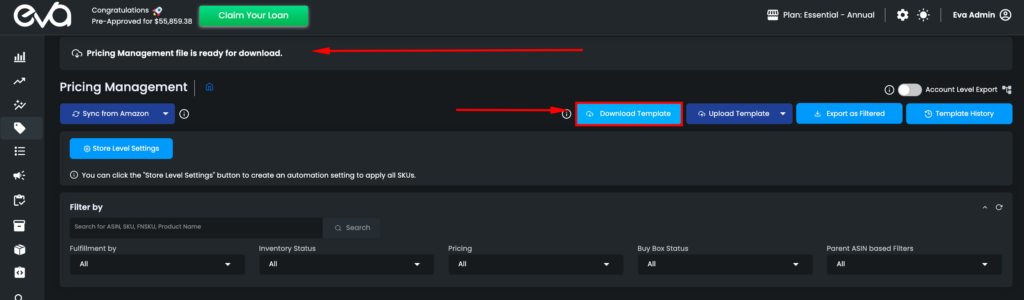
Once the request is completed, the button will turn into the “Download Template” button.
To download the created template for your store, click the “Download Template” button.
See Figure 4.
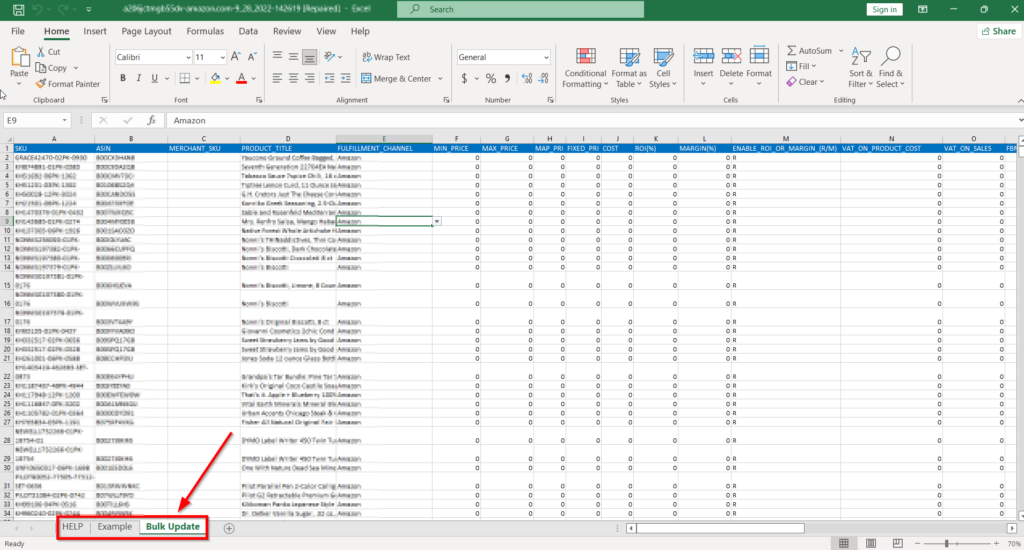
The template has three sheets which are “HELP“, “Example“, and “Bulk Update“.
The “Bulk Update” sheet is the one you should make changes to.
See Figure 5 below.
The 3 Required Sections To Update Pricing Management In Bulk
There are 3 required columns that will need information in them to enable dynamic pricing.
The first step is to enter only the min price, product cost, and enable dynamic pricing.
This way, Eva calculates the max price. And since you entered cost, you will be able to get accurate profit analytics data.
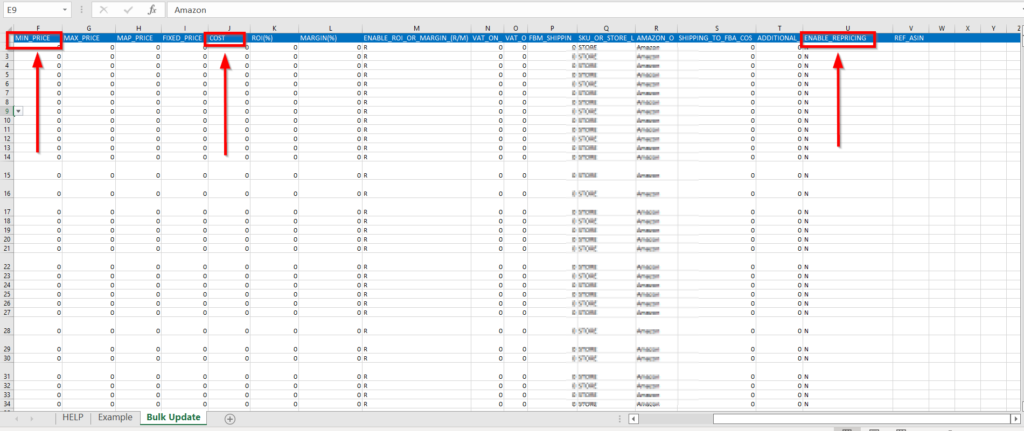
How To Enter Information Into The Required Columns
1. Enter your min price in the “F” column
2. Enter your product cost information in the ”J” column.
3. Enter “Y” in the ”U” column to enable repricing.
See Figure 6 below.
How To Enable Pricing Management By ROI
Alternatively, you can enable ROI-based pricing management by entering the product cost, the desired ROI and enable dynamic pricing.
This way your min. price and max. price will be calculated automatically by Eva, and since you entered cost, you will be able to get accurate profit analytics data.
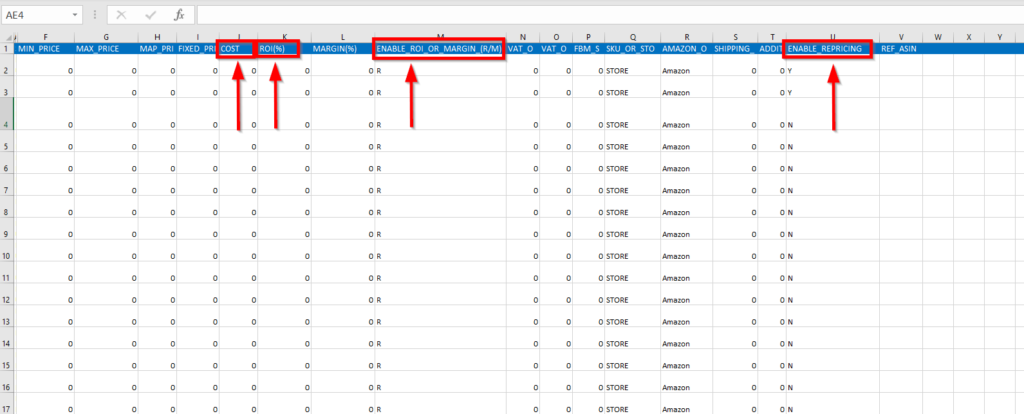
How To Enable Pricing Management By ROI
1. Enter your product cost in the “J” column
2. Enter your desired ROI(%) in the ”K” column.
3. Enter R in the ”M” column.
4. Enter “Y” in the ”U” column to enable repricing.
See Figure 7 below.
How To Enable Pricing Management By Margin
If you are not working with ROI-based returns, you can enable margin-based returns.
All you need to do is to enter the product cost, the desired Margin and enable dynamic pricing.
This way your min. price and max. price will be calculated automatically by Eva, and since you entered cost, you will be able to get accurate profit analytics data.
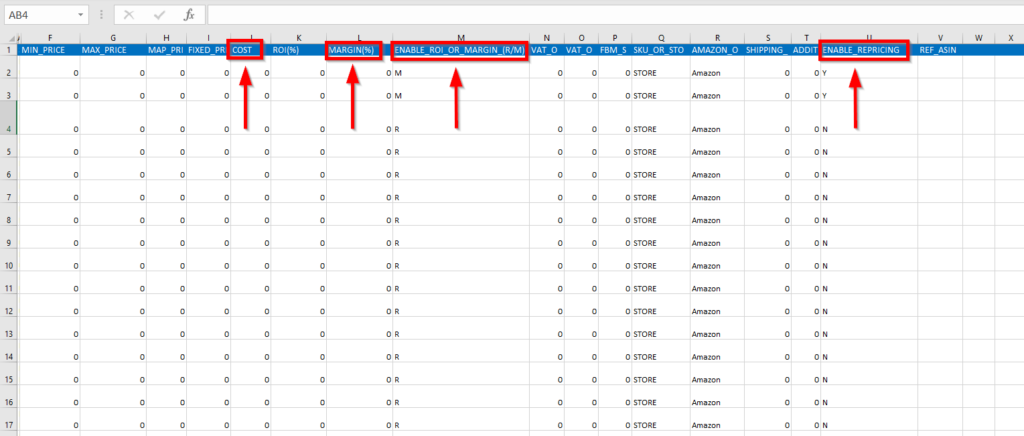
How To Enable Pricing Management By Margin
1. Enter your product cost in the “J” column
2. Enter your desired Margin(%) in the ”L” column.
3. Enter M in the ”M” column.
4. Enter “Y” in the ”U” column to enable repricing.
See Figure 8 below.
The Other “Not Necessary” Columns To Have More Control Of Your Amazon Data
Now, if you’re wanting to unlock the true power of Eva’s pricing management solution, you can fill in other cells in corresponding columns such as N, S & T.
By being able to have this flexibility, Eva gives you the ability to make bulk pricing changes easily & accurately.
Here’s The Other “Not So Used” Columns On The Pricing Spreadsheet
- Maximum Price
- Minimum Advertised Price
- Fixed Price
Maximum Price (Column 7)
This is used for determining a maximum price for Eva, so she will never go above that number.
Minimum Advertised Price (Column 8)
This is used for the stores that use “Minimum Advertised Price“, Eva has a very handy feature.
You can easily set MAP price and even schedule the time slots when you want to apply min price instead of MAP price.
Fixed Price (Column 9)
By setting a “Fixed Price”, your price will be fixed to the desired amount until you disable the setting.
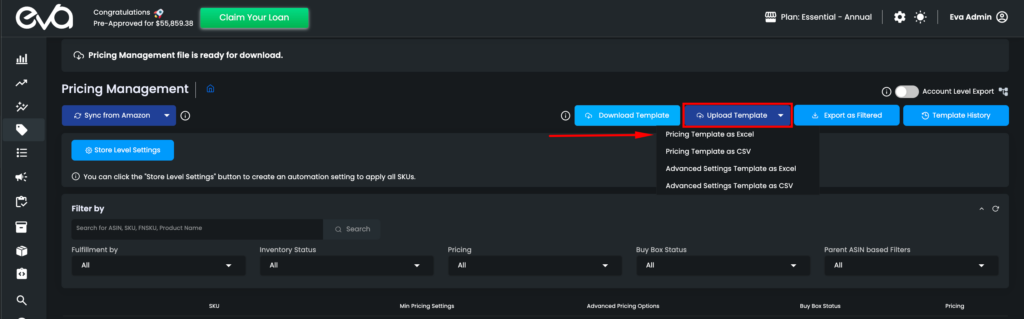
For Eva to analyze your data and start repricing, you have to upload the template you made changes to.
To do so, hover on the “Upload Template” button on the ”Pricing Management” page.
There, you will see four template options. Select Pricing Template as Excel option.
See Figure 9 below.
Once you selected the template, a pop-up screen will appear. Drag or browse and select your file here. The process takes a while depending on the number of listings you have.
See Figure 10 below.
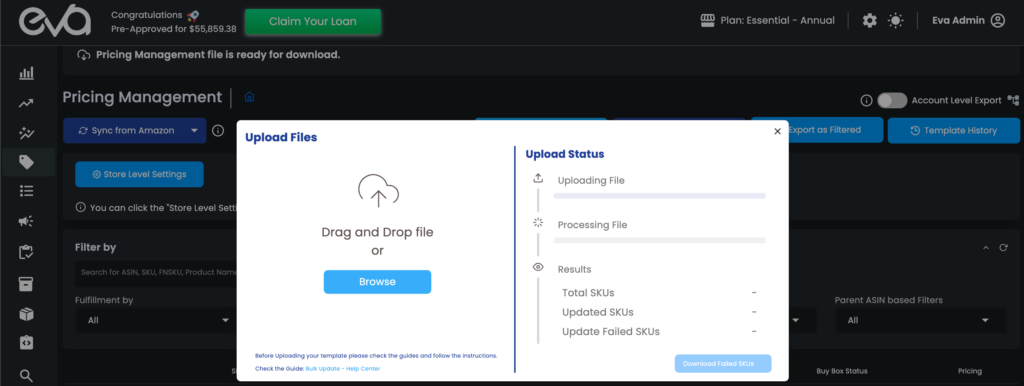
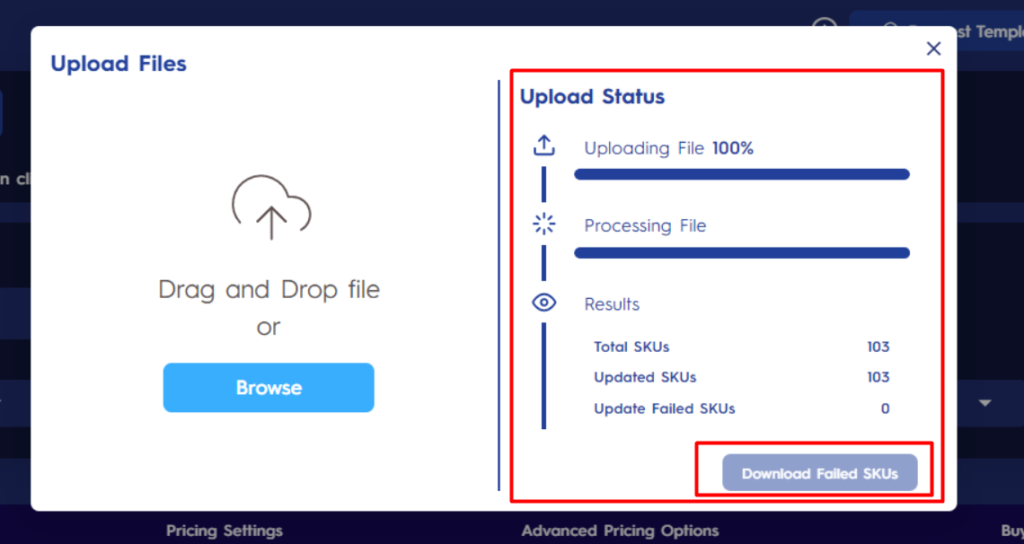
The upload status is shown on the right side of the pop-up screen.
If there are any failed SKUs, you can download these SKUs by clicking on the “Download Failed SKUs” button.
Make any necessary changes and upload them again by following the same steps.
See Figure 11 below.
After entering all the data, Eva will start dynamically pricing and calculating accurate profit analytics.
NOTE: Dynamic Pricing only works when the product is in stock!
You can also edit your Min Price from pricing settings on pricing management, see Figure 12 below.
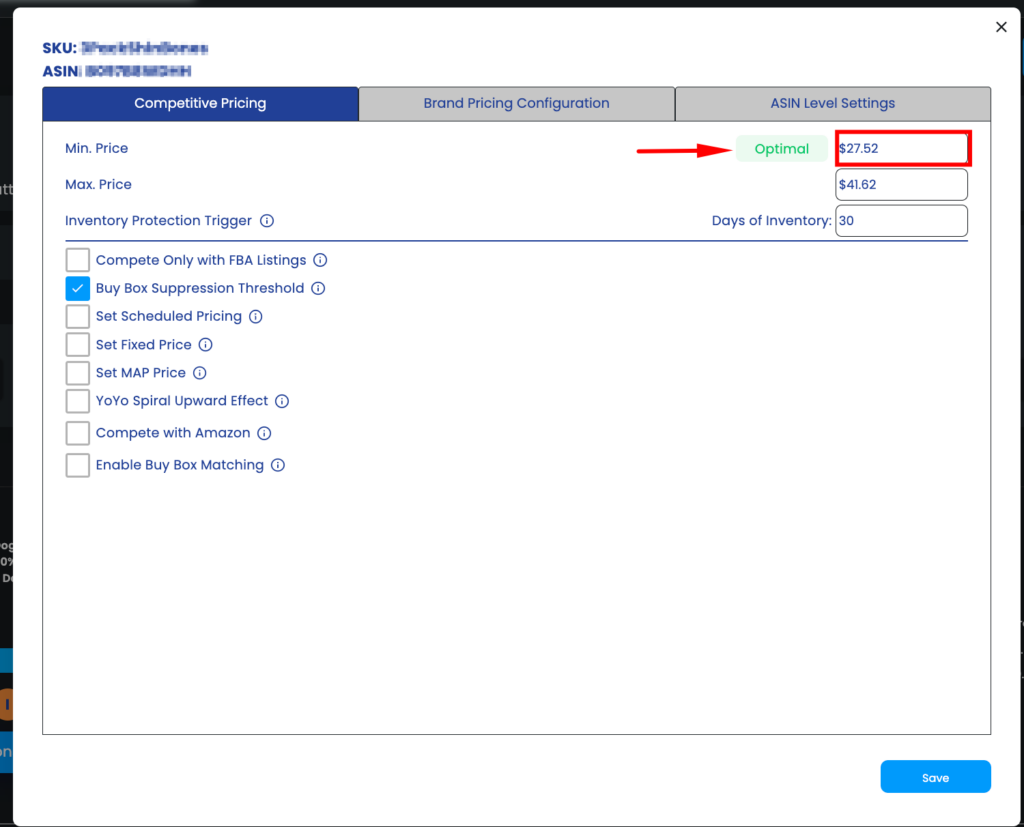
If you calculate your min price by custom min price, it is displayed as Manual. If you calculate your min price by ROI or Margin, it is displayed as Optimal.