Release Note 10 Dec, 2021
Improvements
Higher Number of “Export Data” Option
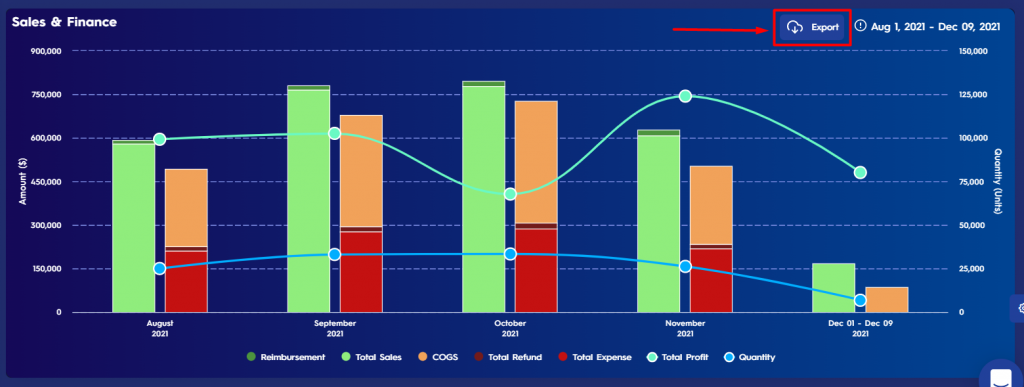
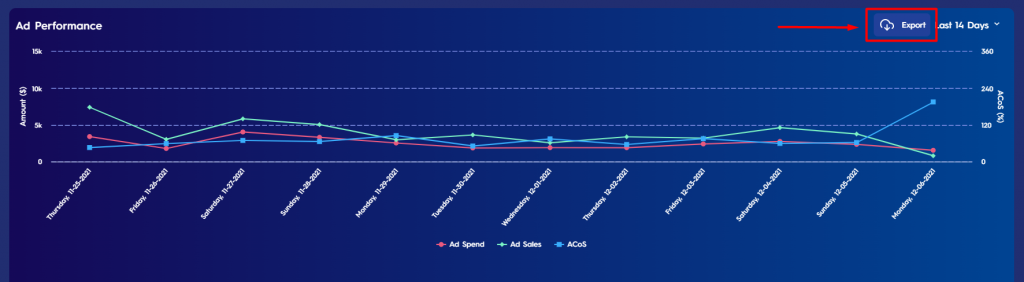
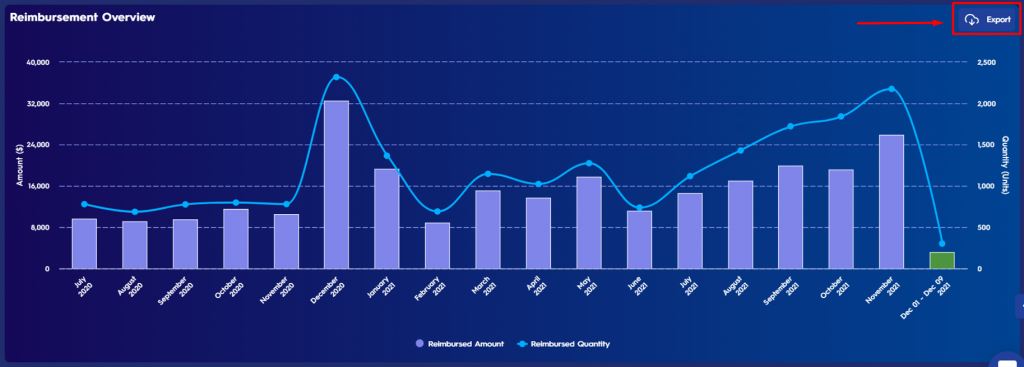
It’s been possible to download the data you see on Eva into a “CSV” file for some of the graphs and now you can do it for more graphs.
For all graphs on the “Executive Dashboard” page, the “Advertising” page, and the “Reimbursement” page, you can download the related data into a “CSV” file. In addition, it is also available for the”ASIN Segmentation” graph. Simply click on the “Export” button on the right-hand side of the related graph in order to download the related file. Please see Figure 1, Figure 2, and Figure 3 below.
Offer Position Info on SKU Rows
It is possible to see the position of your offer comparing the other offers on Amazon.
Eva now displays the position of an offer compared to all the other offers including both FBA and FBM and also the position of an offer compared to the other same fulfillment channel offers.
1. To check the position info, go to the “Pricing Management” page, find the SKU for which you want to see the position info. On the SKU row, you can check the position as #x in Overall, #y in FBA/FBM. Please see Figure 4 below.
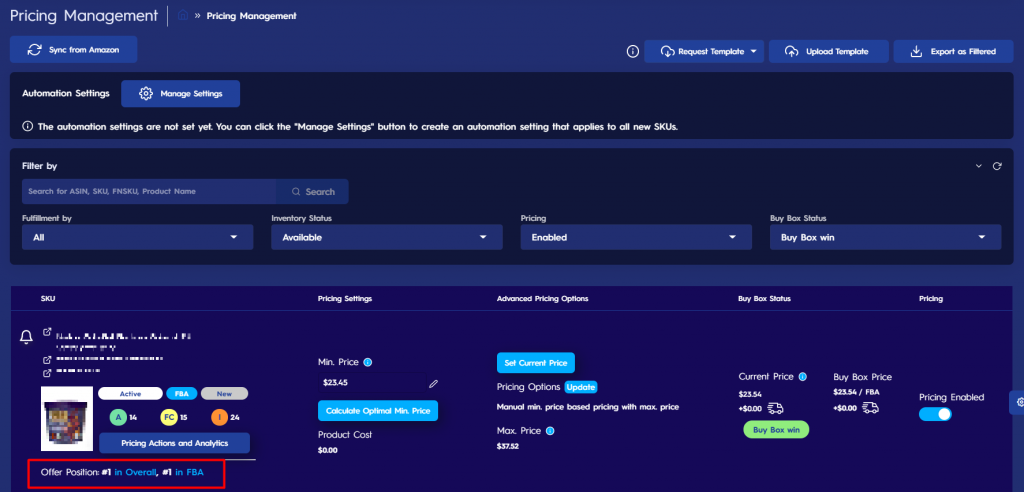
2. If the offer is not among the first 20 offers in overall or/and in the same fulfillment channel offers, the position info is displayed as #20+ in Overall, #20+ in FBA/FBM.
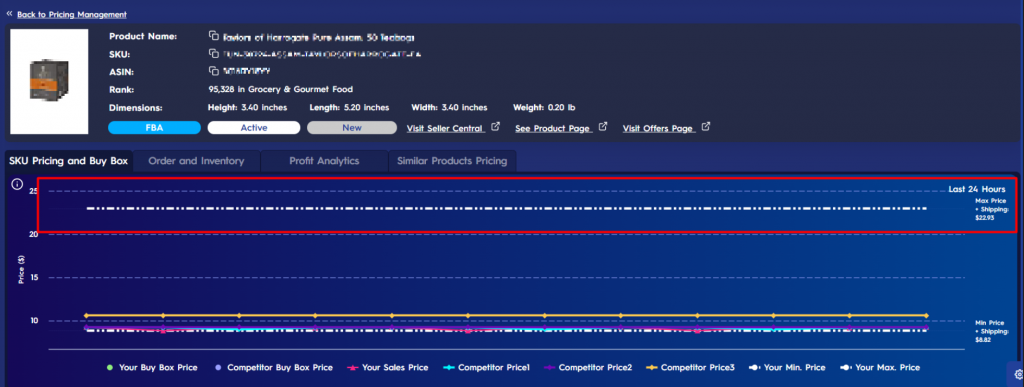
Max Price Line on SKU Pricing and Buy Box Chart
Previously only min price was plotted on the “SKU Pricing and Buy Box Chart“. Now “max price” is also plotted on the chart, so you can track the price range at one glance. Please see Figure 5 below.
New Features
Add New User
It is easier to add a new user to your existing Eva account now.
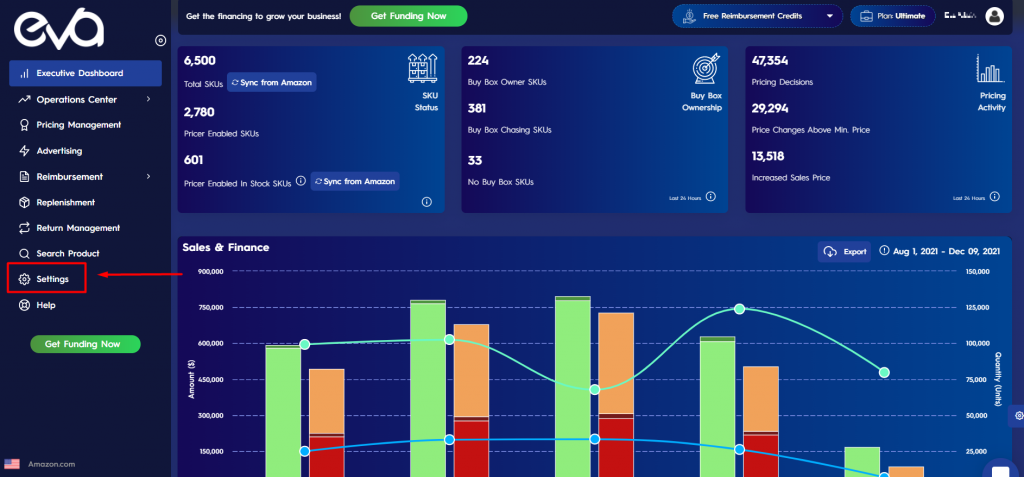
1. To do so, go and click on “Settings” on the Eva control panel. Please see Figure 6 below.
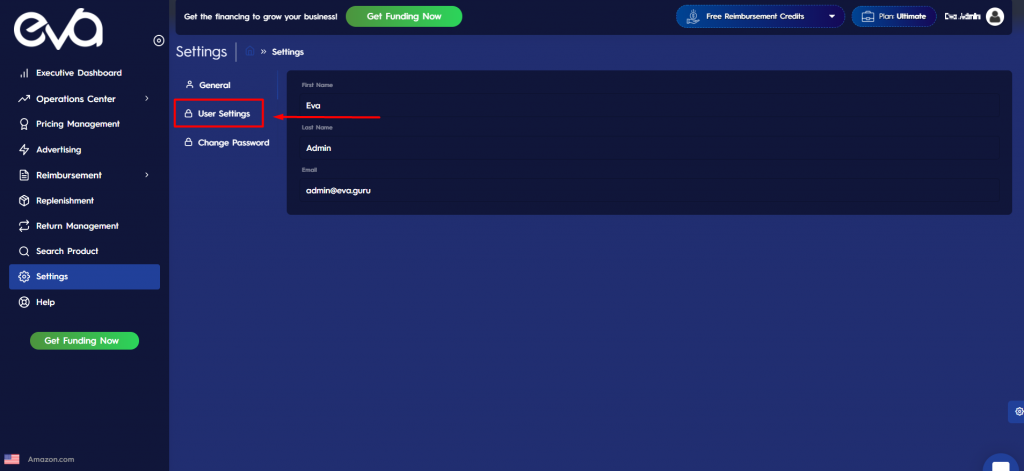
2. Click on the “User Settings” on the open page. Please see Figure 7 below.
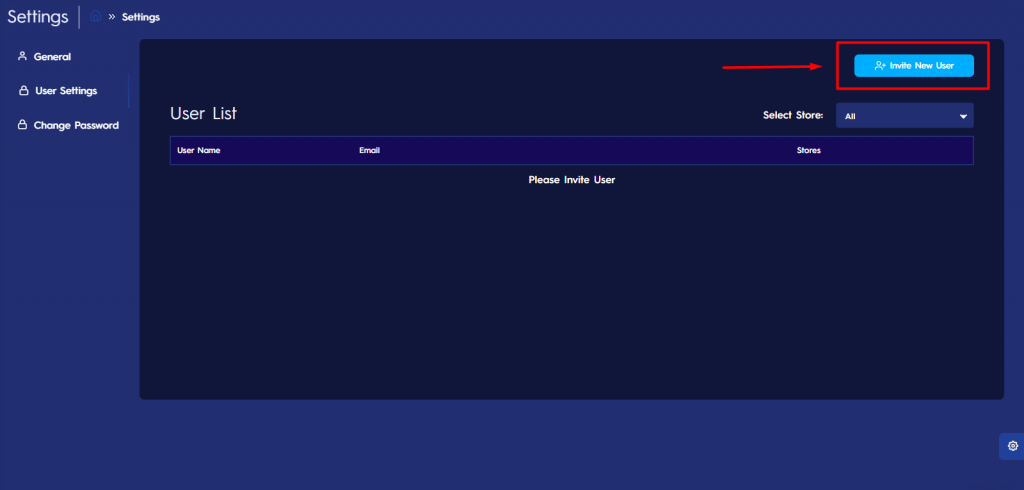
3. You will be directed to the related page. Go and click on “Invite New User“. Please see Figure 8 below.
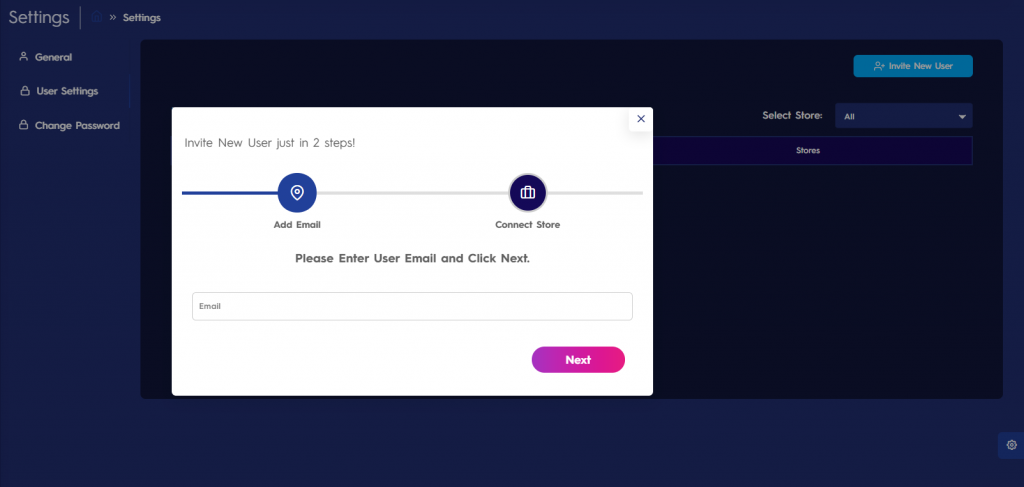
4. A pop-up screen will appear. Enter the “email address” of the new user that you want to add and click “Next“. Please see Figure 9 below.
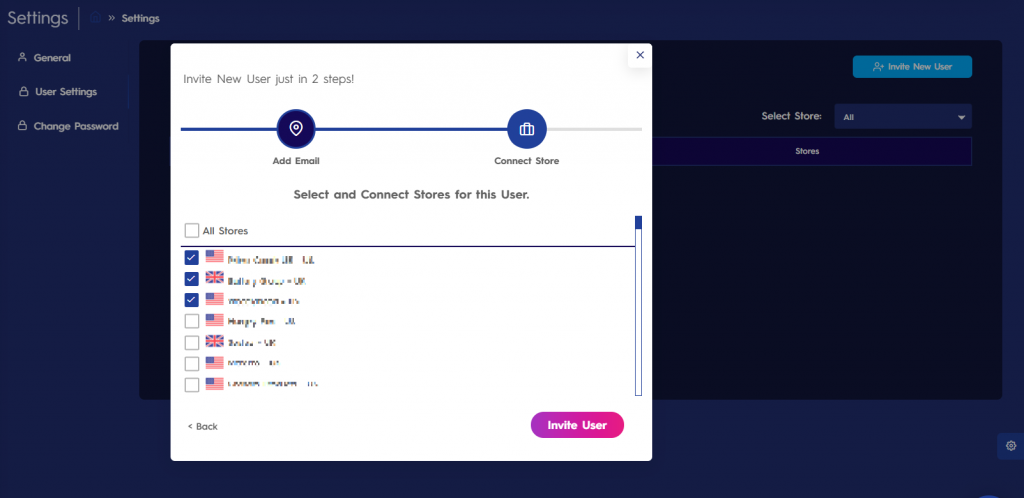
5. If you have more than one store connected to Eva, choose the stores to which you want to give access and click on “Invite User“. Please see Figure 10 below.
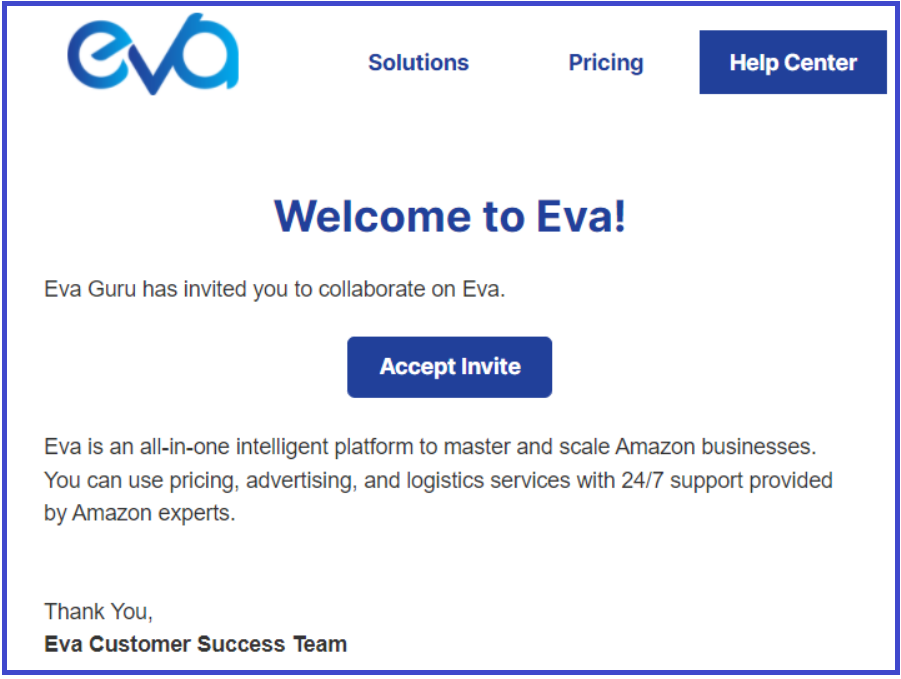
6. Once you send an invitation to the user, the new user will receive an invitation email. S/he needs to go and click on the “Accept Invite” button in the email. Please see Figure 11 below.
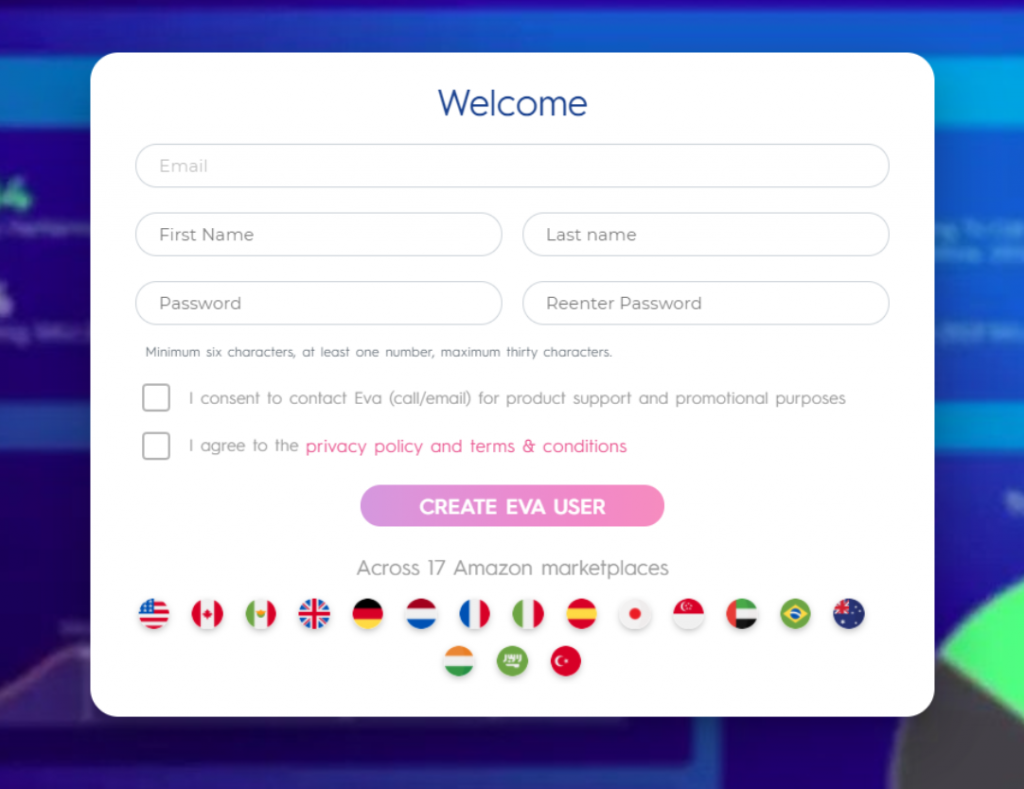
7. Once the invitation is accepted, the new user will be directed to “Welcome” page and will be requested to fill in the form and click on “Create Eva User“. Please see Figure 12 below.
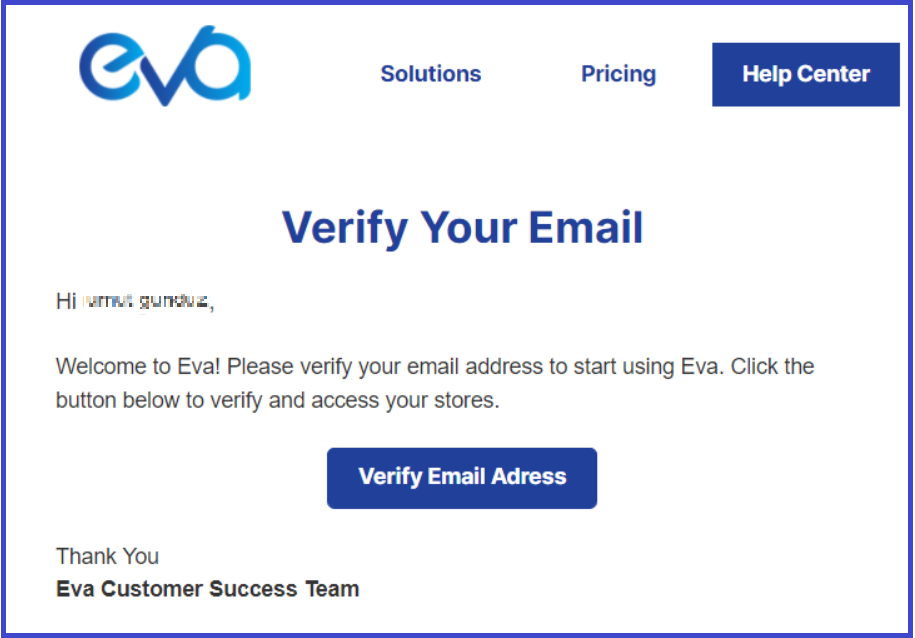
8. S/he will receive a verification email. The new user needs to go and click on the “Verify Email Address” button. Please see Figure 13 below.
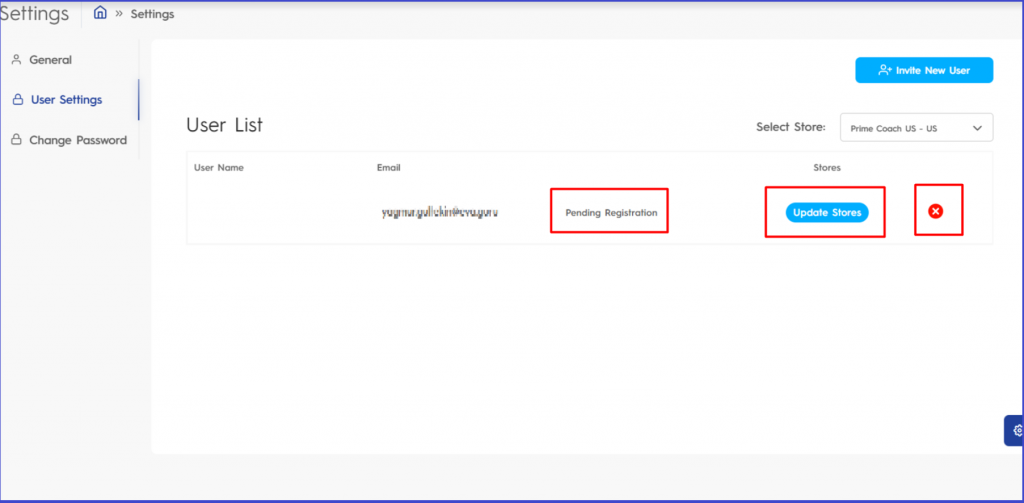
9. You can track the process through the “User Settings” page and also update the access of the new user to different stores by using the “Update Stores” button. 10. You can remove the user by clicking on the red delete symbol anytime you want. Please see Figure 14 below.
Merchant SKU
If you want to give a special name to your SKUs and be able to search them with this name on your Eva account, it is possible to do now.
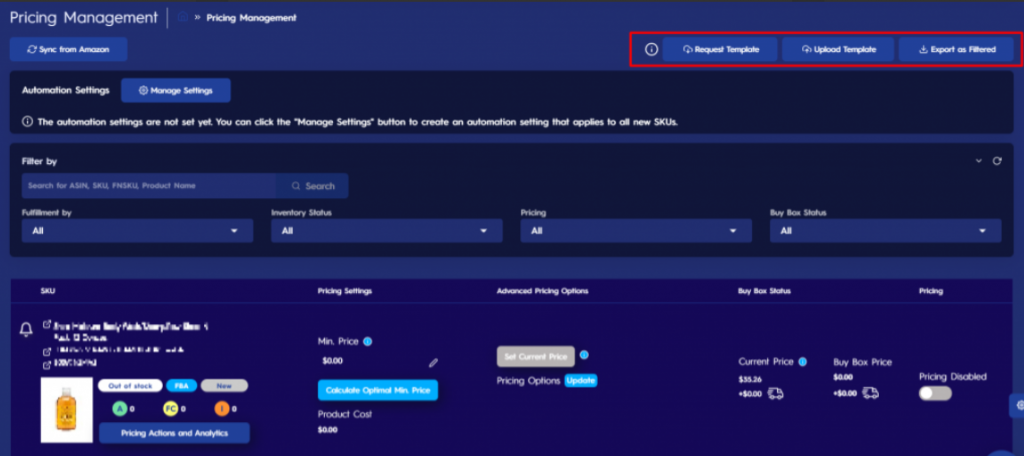
1. To do so, go to “Pricing Mangement” page and click on “Request Template” and choose “Pricing Template” and “Download” the template. Please see Figure 15 below.
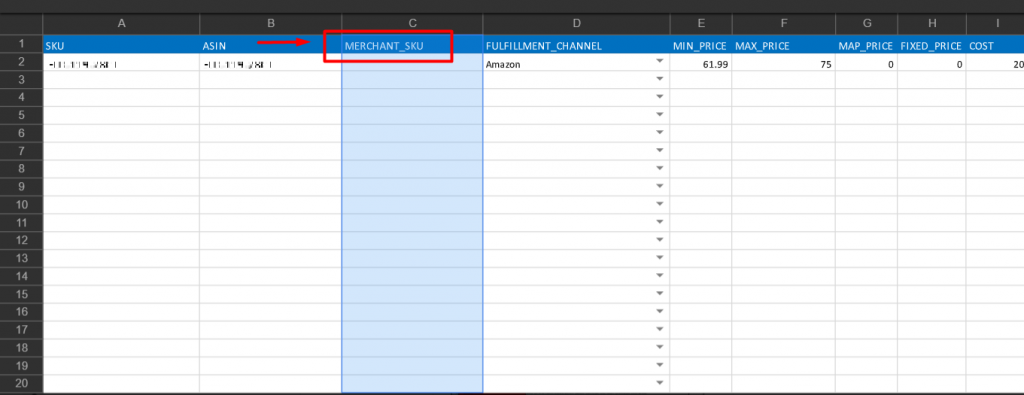
2. Once the file is downloaded, open the file and fill in the “Merchant SKU” column for the SKUs for which you want to denominate and upload it. Please see Figure 16 below.
3. Once it is done, you can see the “Merchant SKU” name on the SKU rows. Please see Figure 17 below.
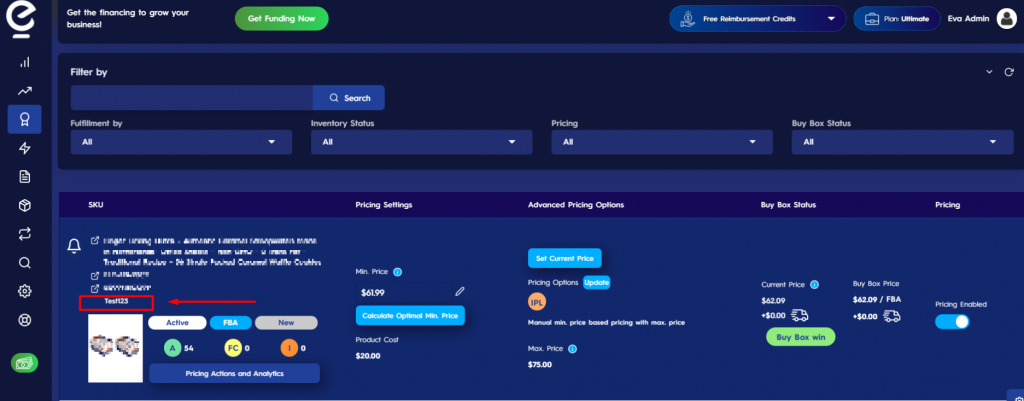
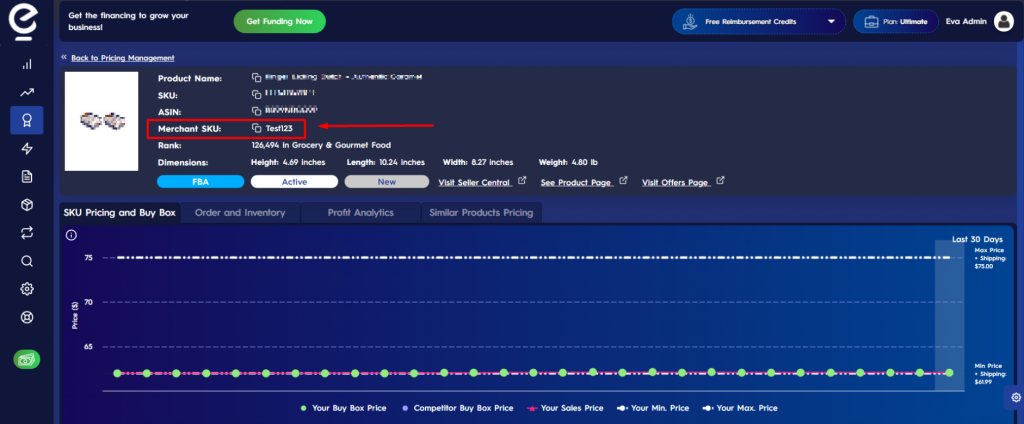
4. It is also possible to see the “Merchant SKU” name on the “Pricing Actions and Analytics” screen. Please see Figure 18 below.
5. If you want to delete or revise the “Merchant SKU“, you can do it by using the bulk update template. Download the templates as explained above and delete or change the “Merchant SKU” column and then upload it back to Eva. The changes will be applied.
Inventory Protection Level Customization on Store and SKU Levels
You can customize the “inventory protection level” in order to protect your IPL score. By default, it is 3 days for resellers and 7 days for private labels. You can customize it on store and SKU levels whenever you want.
1. To do it on the store level, go to the “Pricing Management” page and click on “Manage Settings“. Please see Figure 19 below.

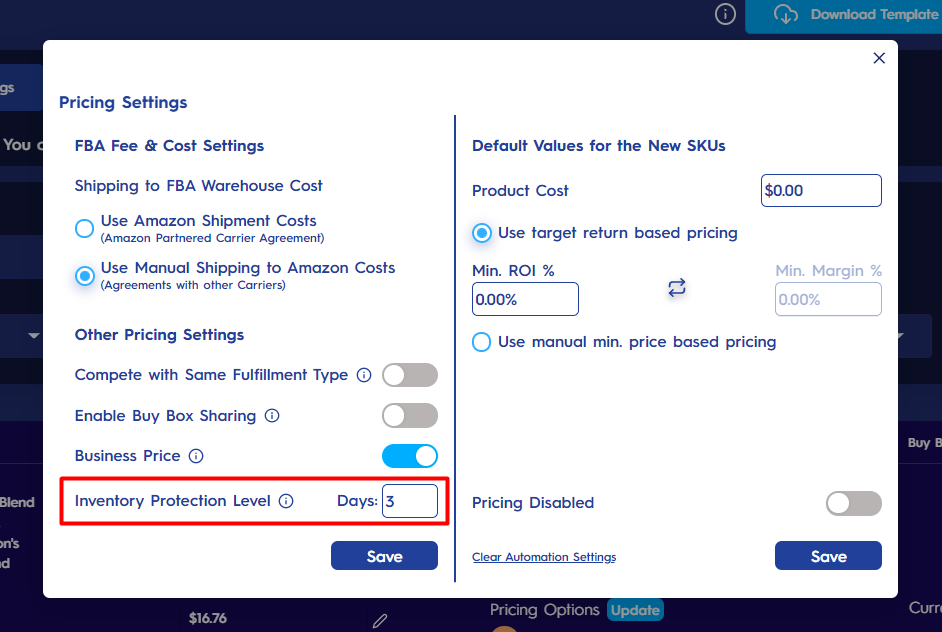
2. A pop-up screen will appear. Go and fill in the related field and click on “Save“. Please see Figure 20 below.

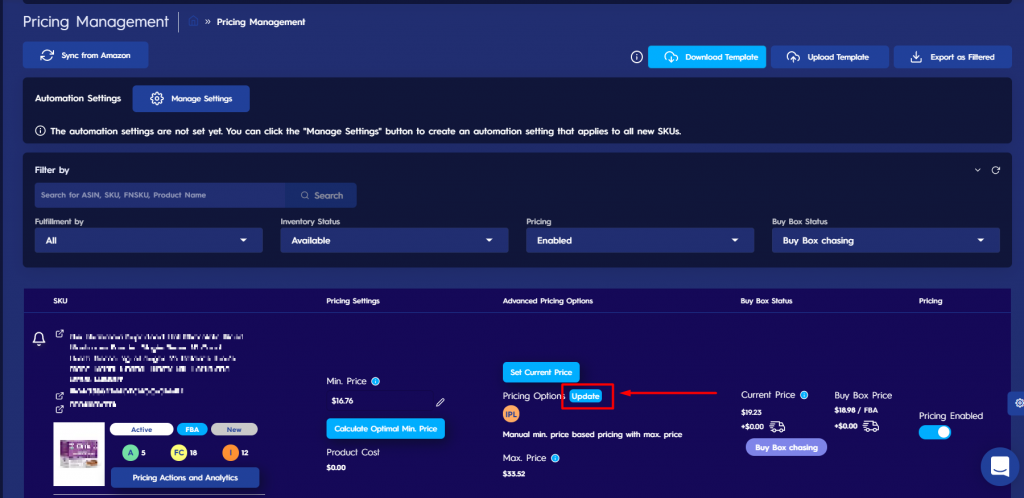
3. To do it on the SKU level, go to the “Pricing Management” page and find the SKU for which you want to customize the inventory protection level. Click on the “Update” button under “Advanced Pricing Options“. Please see Figure 21 below.
4. A pop-up screen will appear. 2. A pop-up screen will appear. Go and fill in the related field and click on “Save“. Please see Figure 22 below.
5. You can see by hovering over the “IPL” tag on the SKU rows under “Advanced Pricing Options” if “inventory protection level” is set on store level or on SKU level. Please see Figure 23 below.

6. Please note that if you enable the “Inventory Protection Level” on the store level and then do “Inventory Protection Level” customizations on the SKU level, the changes that you make on the SKU level will be applied for the related SKUs.