Release Note 22 Dec, 2021
Improvements
Convert Master Store Currency with Customizable Price Options
We have improved the “master store” feature with which you can choose one of your marketplaces as master and convert the currency of other marketplaces accordingly.
If you want to follow a more local responsive strategy for some or all of your stores connected to your master store, you can decrease or increase the price while converting it.
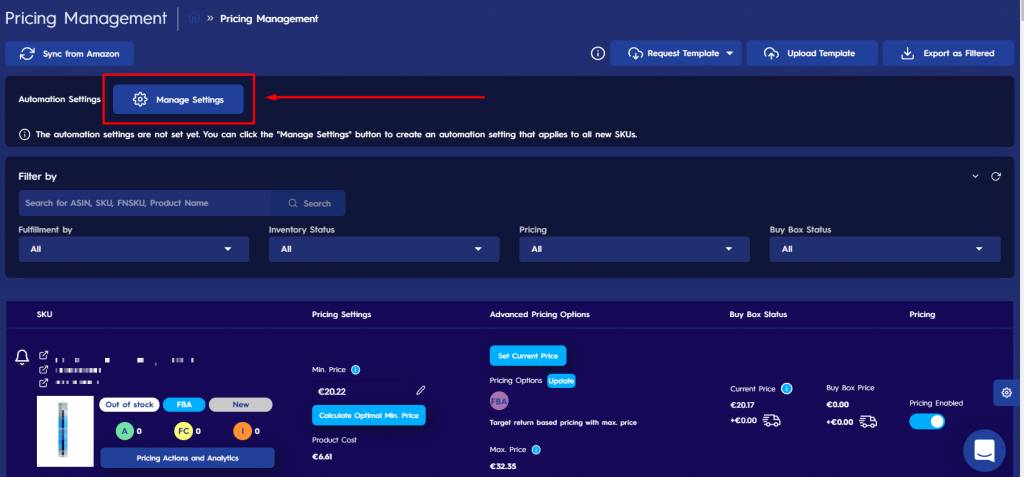
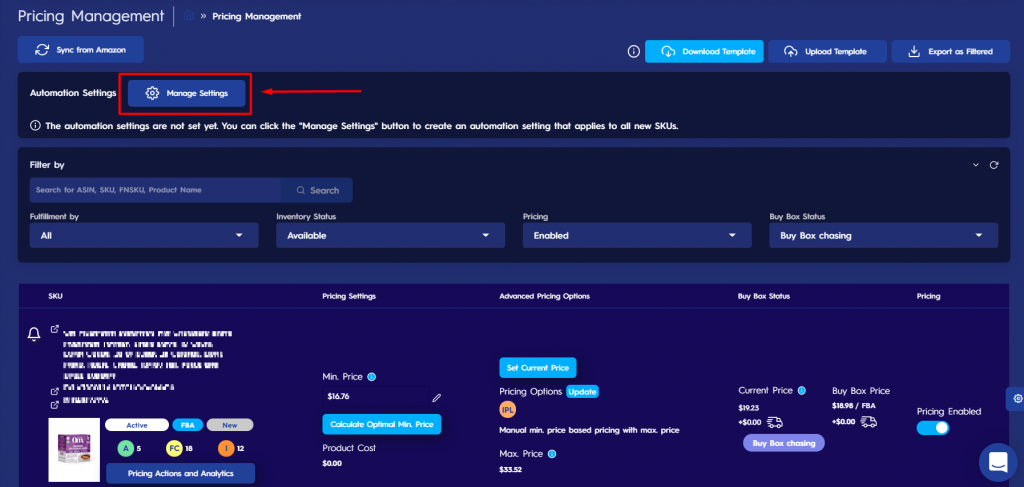
1. To do so, go to the “Pricing Management” page, and click on the “Manage Settings” button Please see Figure 1 below.
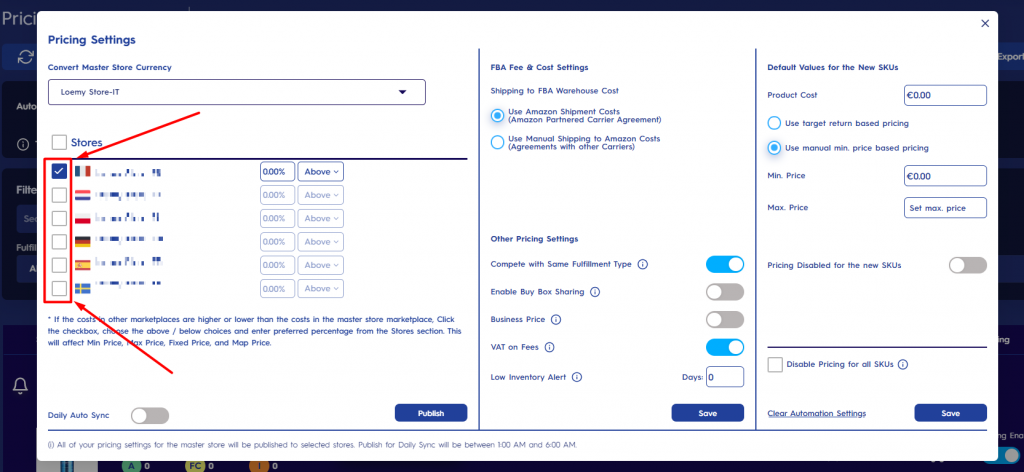
2. A pop-up screen will appear. On this pop-up screen, there is a “Convert Master Store” currency field. For the marketplace you want to decrease or increase the price based on the master store, go and click on the checkbox. Please see Figure 2 below.
3. For the selected stores, you can decrease or increase the price by a certain percentage. Go and fill in the “percentage” field and choose “above” or “below” from the dropdown menu. Please see Figure 3 below.
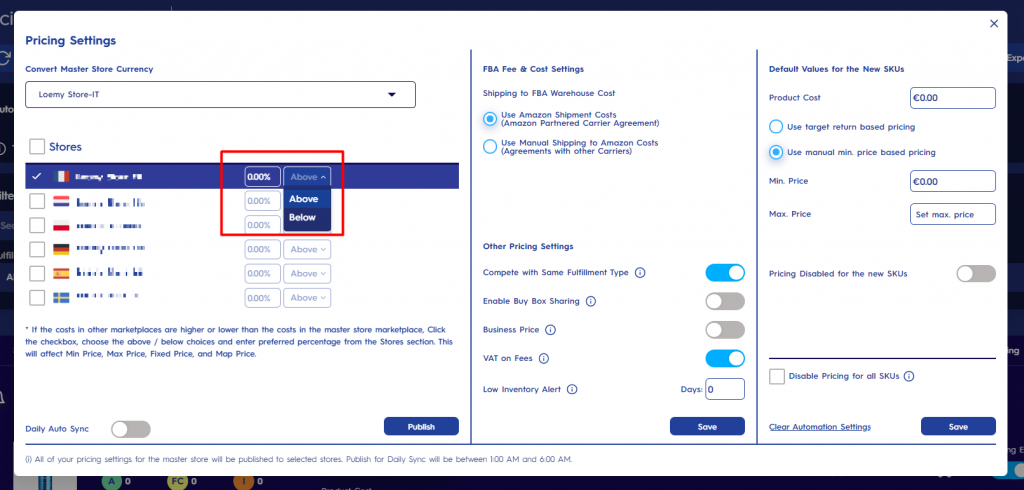
4. After customizing the prices of each marketplace, click on “Publish“.
Disable Pricing for all SKUs
It is now possible to price for all the SKUs
1. To do so, go to the “Pricing Management” page, and click on the “Manage Settings” button Please see Figure 4 below.
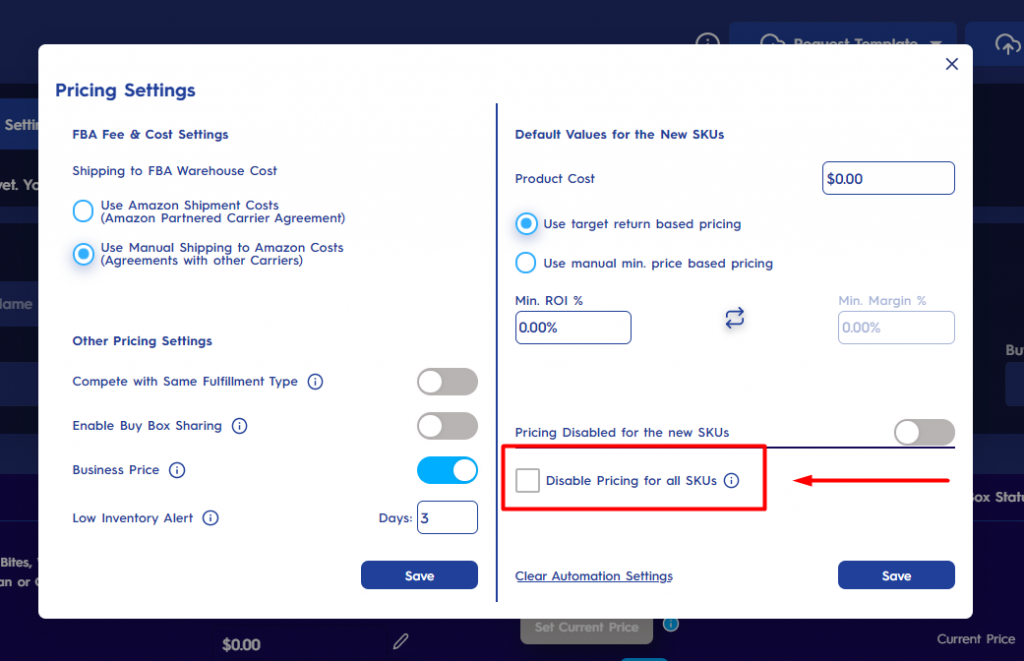
2. A pop-up screen will appear. On this pop-up screen, you can disable pricing for all the SKUs by clicking on the related checkbox. Please see Figure 5 below.
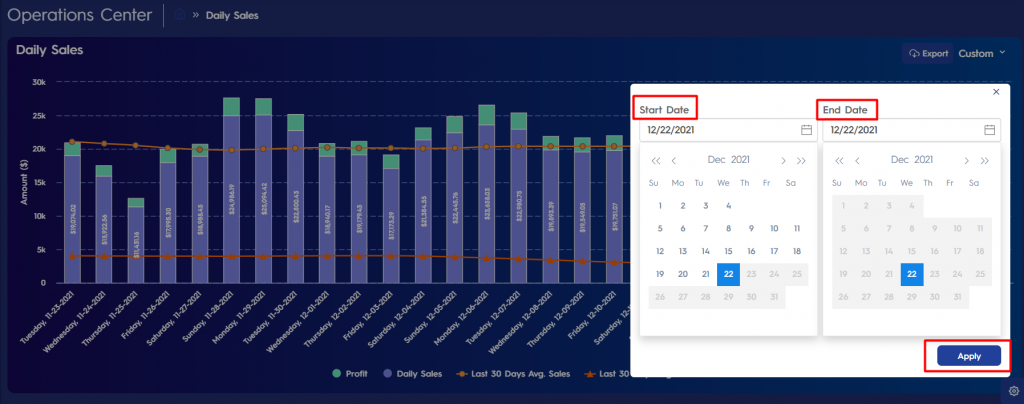
Custom Date Range Selection on Daily Sales
You can customize the date range on daily sales chart now. It is possible to customize it over the last three months and for the current month.
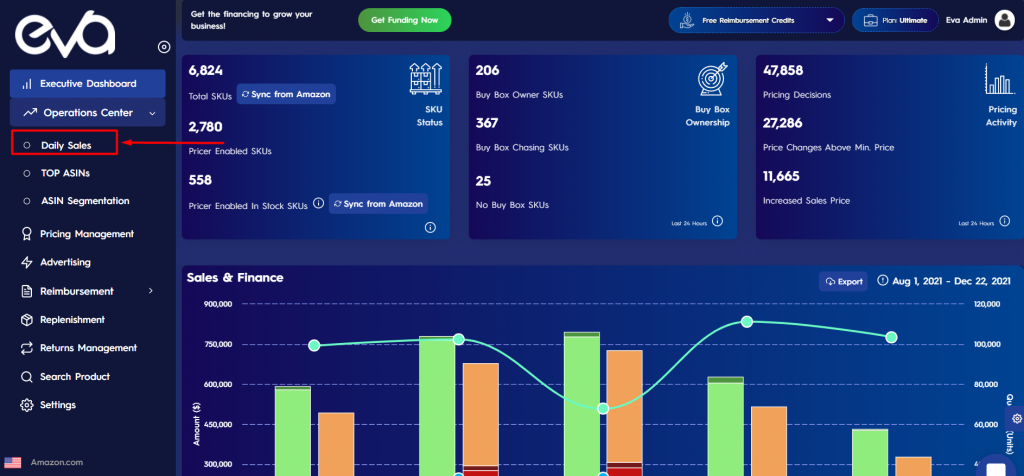
1. To do so, go to the “Daily Sales” Chart by using Eva control panel. Please see Figure 6 below.
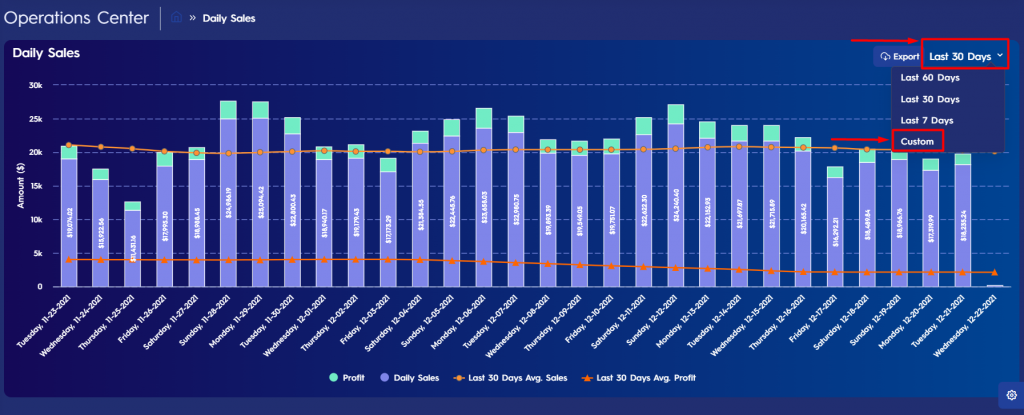
2. Click on the time range menu on the upper right side and choose “custom”. Please see Figure 7 below.
3. A pop-up calendar will appear. Choose the time range you want to see on the graph and click on “Apply“. Please see Figure 8 below.