Receive Orders (3PL Customers only)
You can add receive orders into EVA to feed the Replenishment and Analytics sections. You can easily create a receive order and keep track of them. Additionally, you can download them as a template and even hand them over to your suppliers for orders. The Receive Order tab helps you keep track of and manage your orders inside the Eva platform. You can see the status of your orders and enter information from your supplier, manufacturer, or factory to feed the required information into the replenishment panel, pricing management, and analytics pages.
This process will feed the information into the replenishment tab to represent your inventory accurately. It will ensure that your replenishment simulations are effective and accurate.
To reach the Receive Orders tab and manage your receive orders, first hover to the menu on the left side and click on the Inventory Management and Receive Orders. See Figure 1.

How to Add a Receive Order

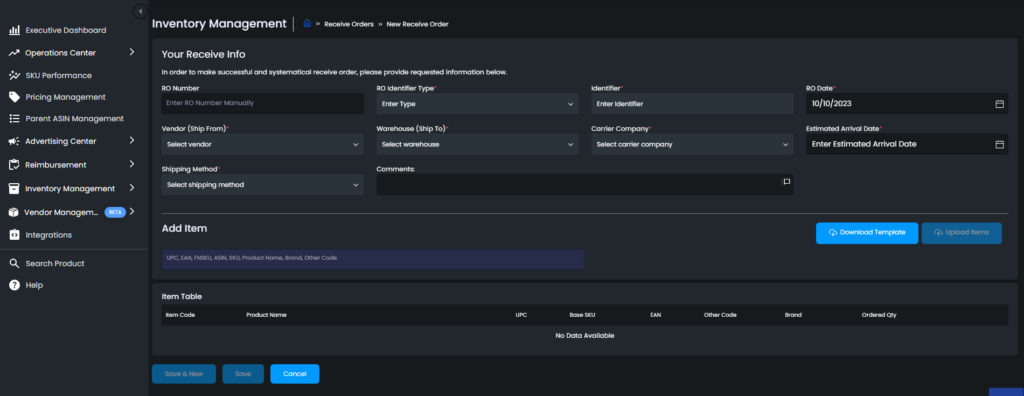
By clicking on the Add New Receive Order, you will be redirected to the page to enter your receive orders. See Figure 3.

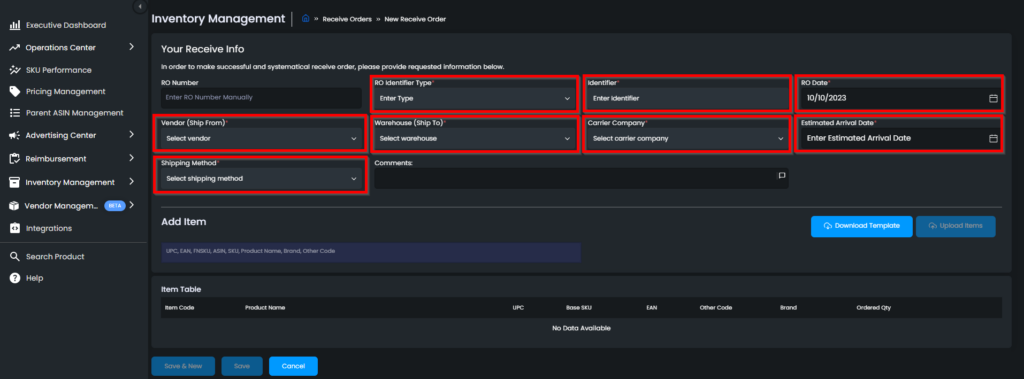
Make sure to fill out every boxes that has ‘*’ to successfully log a new order. Just click the arrow in the box to see the options applicable to your order. See Figure 4

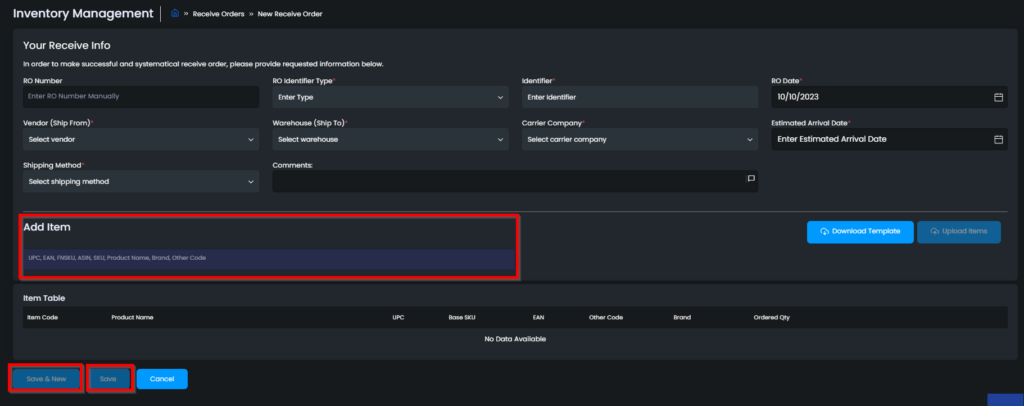
Once every important boxes has been filled out, the Add Item search bar will be unlocked and will allow you to search using UPC, EAN, FNSKU, ASIN, Product Name, Brand and Other Code and will be shown under Item Table. Click ‘Save & New’ or ‘Save’ once done. See Figure 5

After Saving the Order. All of the orders and its details will be shown in the ‘Receive Orders’ tab and can also be filtered using the search bar using UPC, FNSKU, ASIN and RO Number. To see the detailed shipping information about the order just click the arrow. See Figure 6

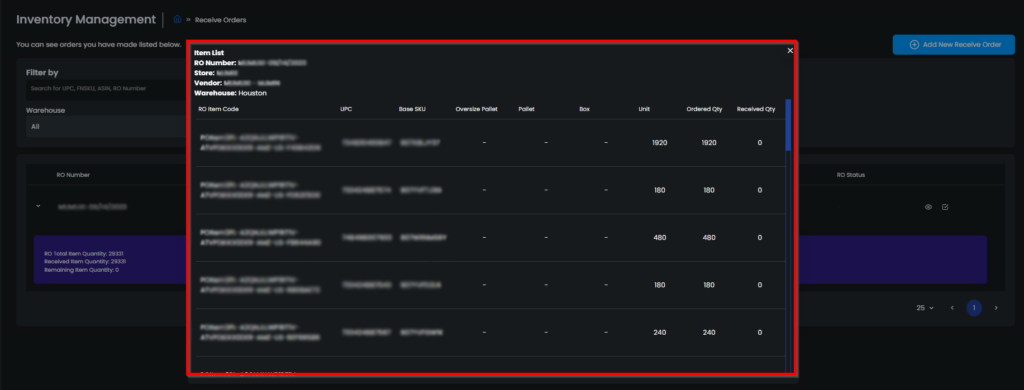
To see the detailed information about the what your order consist of just click the eye icon and the Item List page will pop up. See Figure 7 and 8.


To delete or close an order, just click the box with a checkmark and it will be removed from the dashboard. See Figure 9.

